Showing posts with label basement finish. Show all posts

Wednesday, March 2, 2016

Barn Beam Mantel

It's complete!


It's exactly what I wanted. Actually, it turned out better than I imagined. Thanks to Adam.

Let's go back real quick shall we?
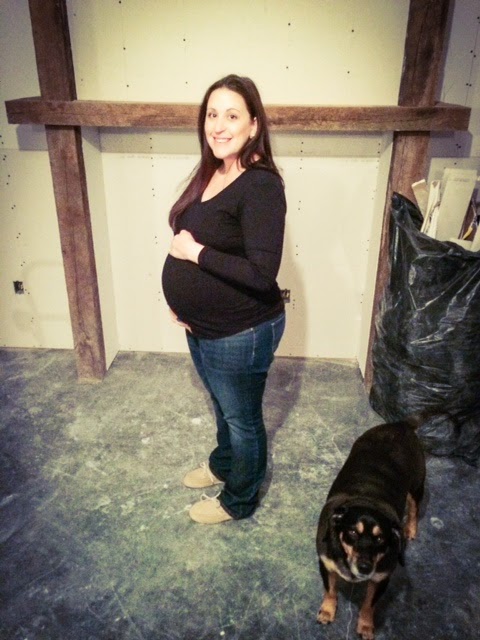
Last time you saw the barn beam mantel it was right after our contractor put it together, and before the drywall mud.  Oh also, I was super pregnant.  About 390-ish days ago...

And now...

I finally framed up Ben's newborn photos too. Extra points for me.


Unfortunately, I didn't even get a nice snap of the finished product before we slapped a TV up there!

Like I mentioned earlier, the mantel looks even nicer than I had imagined it would. The barn beams looked awesome, but you could still see where the wall started and where the beams ended. Well, I thought it looked rustic and as complete as it was going to get. But Adam had other ideas...


Adam and I had been holding onto a few scraps of barn wood trim we salvaged from my mom and dad's remodel. It pays to hoard scraps in the end kids.
In one afternoon he easily trimmed out the beams and created the shelving I wanted.


 He capped off the tops of the beams with a "crown molding"


He also covered this blank space behind the mantel with a removable panel. This is where all of our cords and wires will hide. They'll still be easily accessible.


I'm on the hunt for baskets or bins to put on the floor, and smaller ones to put on the shelves to house toys and games. I can't wait to style these shelves!


You can see all the construction photos of the basement right here. Basement Progress 2015

Friday, February 12, 2016

Carpet!

We have carpet! Finally! You'd think choosing carpet would be quick and simple. Pick your color, texture, order. Done.
Nope. 

I wanted grey and brown carpet to go with the slate look tile in the basement. But there are 1 million options for grey and brown carpet. I lugged home 6-8 sample boards filled with carpet squares. It took forever to commit over which 4x4 sample would look the best spread across my basement. 


Some were way too grey. Most were way too light. This would be a basement with a bar, and kids running around. It had to be able to both hide stains and look good. 


I finally narrowed it down to 2 options. I then basically decided which was the lucky winner by playing eeny meeny miny mo. We measured and ordered.  The carpet would butt up against the tile in the basement bar, and be in the hallway and guest suite.

We went with Weathered Wood by Shaw. After the baseboards were installed, the carpet layer came and finished the whole basement in a few days. He did a great job. It seamed up very nice.

I'm happy with the texture, and the level of softness-- but only about 50/50 with the color in the end.  Most of the time it looks great. But, if you catch it in the right light it can give off too much of a grey + brown tone, which can almost be a shade of purple! Not in all lights, just a certain time of day. Which is so weird to me! However, I think when we actually have furniture in the room and the right lighting, it will brighten it up and pull some of the lighter shades out. It will be less grey/brown/purple than what I'm seeing right now. It's just a sea of carpet!

The carpet being installed did help me to decide that while furniture shopping, we need to go for the light colored furniture not the brown I was originally leaning towards.  Shopping for a couch has all been a pain in the rear for us, I'm hoping the hunt for a comfy sectional does not follow the trend.


In all, we love having the basement carpeted and moved playtime with Ben down stairs immediately. There is so much more room to run..and since we have hardly anything else down there, less things for him to get into! We will be spending so much time in this space!

Tuesday, February 9, 2016

Vintage Ceiling Tile Look for Less in the Bar

You probably noticed the beautiful dark decorative ceiling when we talked about our vintage tavern lights.


Adam really wanted the bar to reflect a ~real bar~ and not a ~home bar~ so I did my best to help him with that vision. I wanted the entertaining space to be a little more sophisticated than the college bachelor pad theme I think that Adam would have done without me vetoing the Big Lebowski posters and such. So, I tried to incorporate both of our wants in this design. Still no Big Lebowski Poster though...

The ceiling I think reflects our style, and goes with the rest of our home. Our contractor brought my design idea to life with a faux beam separating the "entertaining space" and the family space. I didn't want a plain old ceiling over the bar.  We considered using old copper or tin ceiling tiles, but knew that could be pretty costly not to mention hard to find.  

We originally planned to attempt a wood planked ceiling. After discussing with our contractor and figuring material and labor costs, we decided to drywall a large portion of the basement ceiling, mostly in the family room, then go with a combination of decorative and plain ceiling tiles in the rest of the space. This was more efficient as far as cost of labor for install, soundproofing, quick, and less mess!

However, I had a hard time coming to terms with the ceiling tile compromise. I know, it sounds ridiculous.  I just don't love the sponge-y look of most of the ceiling tiles. We went with the least amount of sponge possible for the plain ceiling tiles, and dressed up the rest of the basement with the decorative ones. 

We selected these decorative ceiling tiles from Menards. They come in pre-finished colors, but we opted to purchase them in white and give them a custom DIY paint job.
Spray painting Genesis Ceiling Tiles
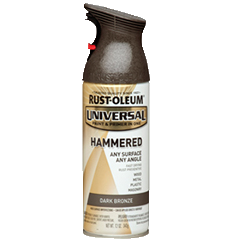
Adam laid them out on plastic in the driveway on a semi-warm winter day and spray painted away.We used Rust-oleum hammered spray paint in dark bronze.


We also sprayed the track the same color before it was installed. It took a few cans of spray paint to paint all 30-ish tiles, but in all it was a pretty cheap way to add a custom look to the ceiling.

We both think it really gives the space the vintage and rustic feel we had in mind.
What do you think? What are you ceiling tile feelings?

Wednesday, January 27, 2016

Vintage Tavern Sconces & other Basement Lighting

It's pretty obvious that I can't design a space in my house without using something vintage. We searched flea markets with our basement design in mind but didn't really come up with any lighting fixtures that fit our taste. Well, my dad came to the rescue with these awesome old tavern lights.


They looked pretty junky when he handed them over. They were full of grime, crusty decades old cigarette smoke from the tavern where they lived combined with being stored in a musty dusty garage for years after that. But I love a good vintage find, and Adam loves old beer goodies so we took them home and cleaned them up.

The pair of Schlitz Bottle Sconces will go behind the bar next to the barn beam floating shelves. They're for sure from a local tavern in my hometown area, and from the late 50's. Just for fun, I did a little bit of googling and I found a few sets listed on Ebay. Guess how much... almost 300 bucks for the set! YIPES. That wasn't even in our budget to buy new sconces! Glad we got these babies for free.
Can be found on Ebay here: Schlitz Bottle Sconces.

1959 Schlitz Tavern Light
My dad also gave us a globe Schlitz light. This one is magical because it not only lights up but the globe spins. A quick google search verified this one was not as old, from the late 60's. I found the Schlitz globe light listed on Ebay too.  I'm surprised they are going for this much. We're not ever selling them, but it's fun to look up the going price of these old finds!


These oldies have been cleaned up and fitted with new wiring for a new home in our basement bar.

We also have been pretty annoyed with each other over the search for pendant lighting for the bar.
I wanted something ORB, and rustic looking.
Adam wanted small--like smaller than they make. But they lights still had to be 'manly enough' for a bar, and had to be adjustable height.

We ended up with 5 Kenroy Home Carson mini pendants.

The color and finish is perfect, and we both agreed on the shape. At 8 inches, they are a little larger than Adam wanted, but we compromised and he's hanging them a little higher than I normally would agree on. Who knew so many ridiculous arguments could be had over lighting. Now we know.

When we were building I had about 95% control over the lighting choices. Adam only vetoed a few of my picks and mostly because they were over budget. This time, he counts the wet bar as his space, so we had to compromise.
Under Construction Basement Bar
Our contractor is building us a beam in the ceiling to help show a separation of the wet bar and the family room. We have a nice separation with the flooring and I wanted to carry that up to the ceiling too. These pendants will be attached to that barn beam.  You can see above where the electrician roughed them in yesterday.

We'll have a few sconces on the barn beam poles in the hallway. We decided on these Globe Electric lights.
We think they'll pair nicely with the pendant lights, and the rest of the fixtures in our home.

We plan to have most of the lights in the basement on a dimmer so we can set the lighting to whatever we like for movie nights, parties, or just hanging out as a family. We're really looking forward to getting this space finished up in the next month or so. It's been lots of work on evenings and weekends.

What do you think of our lighting choices? Would you pay $300 for a vintage light fixture?


Friday, January 22, 2016

Basement Bar: Natural Slate Tile

The basement reno is coming right along. Today we'll concentrate on the progress in the main living area. In this space we'll have a wet bar and large family room.


Like the basement bath, we chose tile from Home Depot. We purchased the Marazzi VitaElegante tile in Ardesia for the rest of the basement.

Adam gets credit for this one. He picked it out. I was surprised myself how much I liked his choice. 
It 's in our price range and came in my preferred 6x24 size. It can pull out the grey from the barn wood that we'll be using and has warm and brown tones in the terracotta rust color that blends well with the rest of our home. We were digging the natural stone look. Everything we wanted. 


We had help with this part of the basement from our contractor. We probably could have handled ourselves, like the bathroom, but we chose to leave it to the professionals. We wanted that fancy angle in the tile to match the angle of the future bar. We felt like that spelled trouble for our novice tile experience. More on the bar plans later.


We chose to tile the entry way from the back patio too. Although we have a decent sized concrete patio and there isn't much chance for muddy shoes...I felt like walking into straight carpet would be a mess. We'll have the carpet laid in a few weeks around the tile.


And just because we hired contractors for some of it, doesn't mean we aren't still working our tails off. Here's Adam installing the door hardware. We're running around buying up the little things like door knobs, bath fans, and lighting this week and doing the little odds and ends when Benjamin is sleeping on weekends.


Next up, the lighting. Who knew lighting could be such a pain to pick out. When we were building, I had about 99% say in the light fixtures, Adam didn't mind. Now since his bar is in the picture, I have to appease him, myself, and our budget! Geesh.

Thursday, January 14, 2016

Basement Bathroom Progress Report

Even though there is crap everywhere, and the lighting is totally off, we wanted to post an in progress update on the basement bathroom reno.

Last post about the basement bathroom renovation I showed you our work in progress sleek tile floor.


Here it is as it stands today. The bathroom is odd L shaped, so it's awkward to get a good angle. Bear with me.


We really love the floors even more now in all their white grout beauty. Especially after we did all the work ourselves. Which is why it's not perfect. We did save a boat load of money. Although, it came with a cost of just a little bickering at each other in the process and sore knees and backs!


As far as the ceiling goes, we chose these decorative tiles from Menards. They are waterproof, and prettier than the spongy foamy tiles. We chose not to drywall this ceiling in case we ever need to get to the plumbing in the ceiling for this bath, and the master bath, which is directly above this room.
You will see these ceiling tiles in another post, we did something fun with them for a different part of the basement!

I made a decision on the real life vintage farm house sink debacle and ordered the faucet.


This is the faucet we ordered. It comes tomorrow, crossing my fingers it's the perfect fit. We measured 30 times, but since the sink is so old it will be tricky.

Most of our fixtures are Delta, but delta had slim pickins of wall mount options that matched the style we want. Can you guess which one we picked? They both cleaned up so nice, it was hard to decide! I might save the answer for the big reveal.
We can't wait to get the sink installed and the doors and trim up, and of course the stool in place.

I'm still researching light fixtures for this space. I feel like I've looked everywhere and can't find the right ones! Sometimes I just get something in my head and can't settle!

Where do you shop for light fixtures?

Monday, December 7, 2015

Basement Bathroom Vintage Farmhouse Sinks & Sleek Floors

We've been making decisions left and right in the basement bathroom. This bathroom is getting whipped into shape this winter, with the rest the basement closely behind. As soon as we get the tile complete, our plumber can install the stool, and the sink. Oh, the sink---we'll get to that part soon. I need your help.

First, let's talk about floors. We're currently this far on the floors:
Excuse the blurry Iphone picture, and the mess.  This was an in-progress-shot. It's only been set. Adam still has to grout this week.

We purchased this tile from the Home Depot.
Marazzi VitaElegante Bianco
As you can see in my iphone photo above, it's much more beige than white. We're going with snow white grout lines. This bathroom won't have a window and it's still a basement bathroom, but we want it to be as light and clean looking as possible.

And now the sink debate.

We have two old junky let's say ~vintage~ sinks currently sitting in our basement. They're not in the best shape, obviously.  These old sinks were once used in Adam's Grandpa's farmhouse...they've been sitting outside in the shed for years and years, until one day, we did a big clean up day...and they were headed for the dumpster.
Adam probably annoyed that I made him haul two old junky sinks home on clean up day.
But, you know me....I can't let a vintage find like this be trashed. So in the back of the jeep they went.


The rust does come off, and I have a call into our plumber for help with switching out the faucets too. My plan is to use one for the laundry room, and one for the basement bathroom.

Adam so nicely hauled them right into the bathroom so I could see how the colors looked.  Right now I like the white, but the green would be sort of fun and eclectic, maybe?

So, green or white? Help!!

See our other basement finish updates:
Related Posts Plugin for WordPress, Blogger...
Follow on Bloglovin
Web Analytics