Showing posts with label project. Show all posts

Monday, December 7, 2015

Basement Bathroom Vintage Farmhouse Sinks & Sleek Floors

We've been making decisions left and right in the basement bathroom. This bathroom is getting whipped into shape this winter, with the rest the basement closely behind. As soon as we get the tile complete, our plumber can install the stool, and the sink. Oh, the sink---we'll get to that part soon. I need your help.

First, let's talk about floors. We're currently this far on the floors:
Excuse the blurry Iphone picture, and the mess.  This was an in-progress-shot. It's only been set. Adam still has to grout this week.

We purchased this tile from the Home Depot.
Marazzi VitaElegante Bianco
As you can see in my iphone photo above, it's much more beige than white. We're going with snow white grout lines. This bathroom won't have a window and it's still a basement bathroom, but we want it to be as light and clean looking as possible.

And now the sink debate.

We have two old junky let's say ~vintage~ sinks currently sitting in our basement. They're not in the best shape, obviously.  These old sinks were once used in Adam's Grandpa's farmhouse...they've been sitting outside in the shed for years and years, until one day, we did a big clean up day...and they were headed for the dumpster.
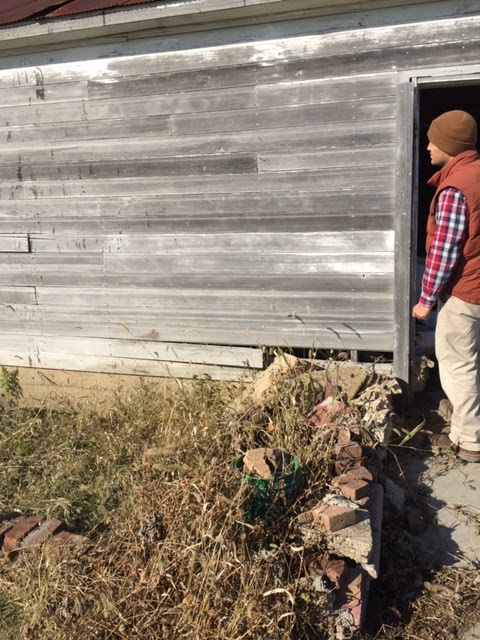
Adam probably annoyed that I made him haul two old junky sinks home on clean up day.
But, you know me....I can't let a vintage find like this be trashed. So in the back of the jeep they went.


The rust does come off, and I have a call into our plumber for help with switching out the faucets too. My plan is to use one for the laundry room, and one for the basement bathroom.

Adam so nicely hauled them right into the bathroom so I could see how the colors looked.  Right now I like the white, but the green would be sort of fun and eclectic, maybe?

So, green or white? Help!!

See our other basement finish updates:

Wednesday, May 13, 2015

Nursery Details: Billy the Bison

I love the animal bust trend all over blogs right now.  I knew I wanted one in the nursery. But didn't want something too modern. I wanted to keep the vintage and preppy theme in the room.

If you remember we added our own flair to a vintage find in our dining room. We gave a $5 flea market find a makeover.

See the before here!

Anyway, back to the Billy Bison.

For this project we used We used the Billy in the Junior size from Cardboard Safari. We chose the classic tan color. I'd seen people paint these, and maybe if we ever change it up, we will do that. But I liked the plain classic tan for this project. It went best with the look of the rest of his room.


It took about 20 minutes to put together. I should point out, that it would have taken less time, but I thought I was super smart and didn't pay much attention to the directions. So I realized I messed it up halfway through---read the instructions, then did it the right way pretty easily.

For the backing we took apart the thrift store frame, and covered the back cardboard in fabric. To secure Billy Jr to it we turned to our trusty staple gun. That's it!


We love the way it looks on his mini gallery wall above his dresser/ changing table. We're really happy with it and know we can use it even as he grows and gets a 'big boy room' in a few years.
photo credit AB Photography

See more of Ben's vintage nursery!
Check out the wild and crazy before of that beautiful blue dresser makeover!

Thanks to Cardboard Safari for providing Billy the Bison for this project! All opinions are my own.

Tuesday, August 19, 2014

Outdoor Space: Staining and Sealing our Back Deck

Thanks to Thompson Water Seal for Sponsoring this project!

Last time we showed you our back deck the house was still in progress.


It's been through just a few changes since then...

Although we spend a ton of time out here in the Spring, Summer, and Fall we waited a little bit longer than we reallllyyy wanted to stain the back deck. We didn't want to do it before the house was finished, and the summer after we moved in there were 1,000 other projects that got in the way. As usual.

This summer we decided it was time to get this baby stained so the wood would be protected. Luckily, waiting the extra year to stain didn't hurt us since the back deck is covered--it already had plenty of protection from the sunlight and harsh Illinois winters.


Thompson Water Seal graciously offered the supplies we needed to get this tough job done!

Step 1: Clean!
This was a really important step that should not be skipped. (Photos were skipped because it went by SO FAST) Even on a new deck like ours--there's dust and grime. It needs to come off.
They sent us deck cleanser to use prior to setting the stain. This was fairly easy and quick. Well, it looked easy, it was more of a 1 person job and Adam did it all. I supervised.

Basically you just follow the directions on the container and mix with water, use a large broom to brush the cleanser, then spray off with the hose.
We saw so much grime come off the deck with just one application!

We waited the instructed 48 hours for the deck to dry before we began to apply the stain.

Step 2: Stain!

We started staining the underneath of the deck first. This may have been the wrong way to do it, but we thought it worked out well for us. We were able to do the bottom and underneath, then later just touched up any drips that came down when we applied the stain to the floor above. Touch ups were easier than covering up any hug drips this way.


 Thompson Water Seal let us try one of their newer semi-transparent tinted stains in Desert Brown.


 When we first applied our first thought was  'OH NO, why is this pinkish toned?' But when it dried it was the perfect tint.

We used brushes to do all the edges, and then a foam roller to do the smooth parts.


Drying nicely.


Since we have a walkout basement, if we didn't stain the underneath and bottom of the deck at all, it would look goofy if you were downstairs or in the backyard. Yay, extra work for us.

Scout supervised, as usual...

This was a 2 weekend project. Although it's been a mild summer, we once again patted ourselves on the back for building a covered deck. It wasn't it too bad (with the fan running) the entire time we were working outside, but it will also protect the stain from harsh weather and sun. This should prolong the time between treatments.


 We started the top of the deck by doing the railings and balusters first.


Don't you just love how the color turned out?


 Gotta get every inch!

Then on the floor we started from the edges, then filled in the middle part all at once.


This...was the easiest part of the staining process!


We were extra lucky and HomeRight provided us with a new tool for this job. We were able to test out their StainStick with Gap Wheel for this HUGE project! It was put to good use and we have a a full review of this product coming soon!


Come back for our completely honest review of the HomeRight StainStick with Gap Wheel and of course the final reveal of our outdoor living space!! I can't wait to show you our favorite summer spot!

We were provided with the supplies for this project. As usual, all statements in opinions in this post are mine. 

Do you have a favorite outdoor space?
Anyone else stain or seal their back deck this year?
Any big weekend plans? We are headed to a Jimmy Buffett concert! Woohoo! 
Related Posts Plugin for WordPress, Blogger...
Follow on Bloglovin
Web Analytics