Showing posts with label bar. Show all posts

Tuesday, February 9, 2016

Vintage Ceiling Tile Look for Less in the Bar

You probably noticed the beautiful dark decorative ceiling when we talked about our vintage tavern lights.


Adam really wanted the bar to reflect a ~real bar~ and not a ~home bar~ so I did my best to help him with that vision. I wanted the entertaining space to be a little more sophisticated than the college bachelor pad theme I think that Adam would have done without me vetoing the Big Lebowski posters and such. So, I tried to incorporate both of our wants in this design. Still no Big Lebowski Poster though...

The ceiling I think reflects our style, and goes with the rest of our home. Our contractor brought my design idea to life with a faux beam separating the "entertaining space" and the family space. I didn't want a plain old ceiling over the bar.  We considered using old copper or tin ceiling tiles, but knew that could be pretty costly not to mention hard to find.  

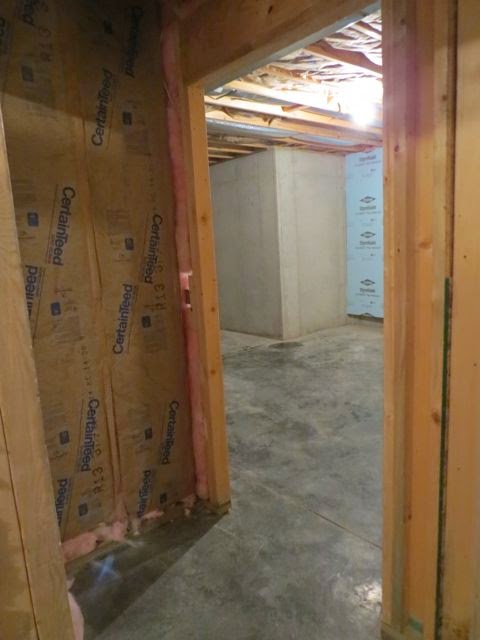
We originally planned to attempt a wood planked ceiling. After discussing with our contractor and figuring material and labor costs, we decided to drywall a large portion of the basement ceiling, mostly in the family room, then go with a combination of decorative and plain ceiling tiles in the rest of the space. This was more efficient as far as cost of labor for install, soundproofing, quick, and less mess!

However, I had a hard time coming to terms with the ceiling tile compromise. I know, it sounds ridiculous.  I just don't love the sponge-y look of most of the ceiling tiles. We went with the least amount of sponge possible for the plain ceiling tiles, and dressed up the rest of the basement with the decorative ones. 

We selected these decorative ceiling tiles from Menards. They come in pre-finished colors, but we opted to purchase them in white and give them a custom DIY paint job.
Spray painting Genesis Ceiling Tiles
Adam laid them out on plastic in the driveway on a semi-warm winter day and spray painted away.We used Rust-oleum hammered spray paint in dark bronze.


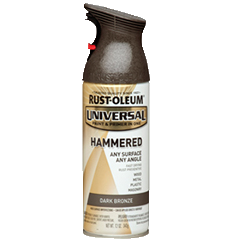
We also sprayed the track the same color before it was installed. It took a few cans of spray paint to paint all 30-ish tiles, but in all it was a pretty cheap way to add a custom look to the ceiling.

We both think it really gives the space the vintage and rustic feel we had in mind.
What do you think? What are you ceiling tile feelings?

Wednesday, January 27, 2016

Vintage Tavern Sconces & other Basement Lighting

It's pretty obvious that I can't design a space in my house without using something vintage. We searched flea markets with our basement design in mind but didn't really come up with any lighting fixtures that fit our taste. Well, my dad came to the rescue with these awesome old tavern lights.


They looked pretty junky when he handed them over. They were full of grime, crusty decades old cigarette smoke from the tavern where they lived combined with being stored in a musty dusty garage for years after that. But I love a good vintage find, and Adam loves old beer goodies so we took them home and cleaned them up.

The pair of Schlitz Bottle Sconces will go behind the bar next to the barn beam floating shelves. They're for sure from a local tavern in my hometown area, and from the late 50's. Just for fun, I did a little bit of googling and I found a few sets listed on Ebay. Guess how much... almost 300 bucks for the set! YIPES. That wasn't even in our budget to buy new sconces! Glad we got these babies for free.
Can be found on Ebay here: Schlitz Bottle Sconces.

1959 Schlitz Tavern Light
My dad also gave us a globe Schlitz light. This one is magical because it not only lights up but the globe spins. A quick google search verified this one was not as old, from the late 60's. I found the Schlitz globe light listed on Ebay too.  I'm surprised they are going for this much. We're not ever selling them, but it's fun to look up the going price of these old finds!


These oldies have been cleaned up and fitted with new wiring for a new home in our basement bar.

We also have been pretty annoyed with each other over the search for pendant lighting for the bar.
I wanted something ORB, and rustic looking.
Adam wanted small--like smaller than they make. But they lights still had to be 'manly enough' for a bar, and had to be adjustable height.

We ended up with 5 Kenroy Home Carson mini pendants.

The color and finish is perfect, and we both agreed on the shape. At 8 inches, they are a little larger than Adam wanted, but we compromised and he's hanging them a little higher than I normally would agree on. Who knew so many ridiculous arguments could be had over lighting. Now we know.

When we were building I had about 95% control over the lighting choices. Adam only vetoed a few of my picks and mostly because they were over budget. This time, he counts the wet bar as his space, so we had to compromise.
Under Construction Basement Bar
Our contractor is building us a beam in the ceiling to help show a separation of the wet bar and the family room. We have a nice separation with the flooring and I wanted to carry that up to the ceiling too. These pendants will be attached to that barn beam.  You can see above where the electrician roughed them in yesterday.

We'll have a few sconces on the barn beam poles in the hallway. We decided on these Globe Electric lights.
We think they'll pair nicely with the pendant lights, and the rest of the fixtures in our home.

We plan to have most of the lights in the basement on a dimmer so we can set the lighting to whatever we like for movie nights, parties, or just hanging out as a family. We're really looking forward to getting this space finished up in the next month or so. It's been lots of work on evenings and weekends.

What do you think of our lighting choices? Would you pay $300 for a vintage light fixture?


Friday, January 22, 2016

Basement Bar: Natural Slate Tile

The basement reno is coming right along. Today we'll concentrate on the progress in the main living area. In this space we'll have a wet bar and large family room.


Like the basement bath, we chose tile from Home Depot. We purchased the Marazzi VitaElegante tile in Ardesia for the rest of the basement.

Adam gets credit for this one. He picked it out. I was surprised myself how much I liked his choice. 
It 's in our price range and came in my preferred 6x24 size. It can pull out the grey from the barn wood that we'll be using and has warm and brown tones in the terracotta rust color that blends well with the rest of our home. We were digging the natural stone look. Everything we wanted. 


We had help with this part of the basement from our contractor. We probably could have handled ourselves, like the bathroom, but we chose to leave it to the professionals. We wanted that fancy angle in the tile to match the angle of the future bar. We felt like that spelled trouble for our novice tile experience. More on the bar plans later.


We chose to tile the entry way from the back patio too. Although we have a decent sized concrete patio and there isn't much chance for muddy shoes...I felt like walking into straight carpet would be a mess. We'll have the carpet laid in a few weeks around the tile.


And just because we hired contractors for some of it, doesn't mean we aren't still working our tails off. Here's Adam installing the door hardware. We're running around buying up the little things like door knobs, bath fans, and lighting this week and doing the little odds and ends when Benjamin is sleeping on weekends.


Next up, the lighting. Who knew lighting could be such a pain to pick out. When we were building, I had about 99% say in the light fixtures, Adam didn't mind. Now since his bar is in the picture, I have to appease him, myself, and our budget! Geesh.

Wednesday, February 4, 2015

Basement Progress: Drywall...and the Details on those Barn Beams!

The basement space is a project we've talked about since we started digging.


We have always had plans for this basement to be a living space we will use every day.


It would host a family room, an office, an guest (in-law) suite, a play room, storage, and most importantly on my husband's list---a bar.

 And no, not a stupid man cave.
We talked about what we want in the basement and look we are heading towards last year about why our basement is NOT going to be a mancave.

Well, after we paid off all of our debt (except our mortgage) and saved up a little cash we decided it's time to start this massive project.
It will take a little longer than normal as we are cash-flowing this project. (Oh and don't forget having a BABY at the same time..I hear havin' kids ain't cheap!)

This is what we are starting with after we've been all moved in for a few years. Pretty much nothing.

Old couches, a foosball table, insulation everywhere, a few pieces of drywall up, and some old cabinets my parents gifted us when they did their kitchen remodel.
The back wall where the cabinets are is actually the super rough layout for Adam's bar.

A walk down the future hallway...

We look into the future guest bath.

Future guest suite and office will be in here.

Lovely huh?

We had the contractors come last week. They worked for about a day 1/2...and they worked their tails off...

DRYWALL IS NOW UP! Plus, the start of the barn beam bump out built ins has begun!

Adam had the idea to use the old barn beams we have to create almost a faux mantle with built-ins where the TV will sit. Perfect.

They got so much work done in the first day...then only had to come back for about a half day to finish the drywall...

Looking down the hallway that leads into the guest bedroom and bath --with walls!

The bar will be at the end of this room.


Taking measurements in the future full bath...

A view standing at the end of the above hallway.

And the faux mantle bump out is looking great already!


Side view so you can see the angles better. There will be shelving in that blank space along the sides too--with a fake backer so that we can easily get to the wires etc when we need to.
There will be shelving below the horizontal beam too for things like books, knick-knacks, baskets of toys and movies.

The barn beams will also be making an appearance in other parts of the basement. We've got a heck of a lot of them and you better bet we are using them!

Next on the list is getting it mudded. We talked about DIYing this...but with me about two weeks shy of my due date...we wanted to get crackin' and get this part done before the little one gets here. We can't exactly have contractors going in and out when we've got a newborn, so the basement will be put on hold for a few months when he decides to make his grand arrival.

Speaking of babyN. I am sneaking a belly shot in here since I have been stingy. 38 weeks!

So...how about a look at the nursery? We aren't quite finished...but we are close! We will be sharing his room next!

Thursday, March 6, 2014

Basement Finish and why it's not called a "Man Cave"

So, today we are doing to daydream together. Are you ready?

We are daydreaming about my basement.

No, not a creepy cold dungeon basement (which is what it kind of is right now) but a rustic, chic-yet still manly retreat. A place where the beer flows on Saturday nights. There’s a big fluffy overstuffed sectional for napping and watching Roseanne Marathons on Sundays. This basement boasts an in-law suite, with a full guest bathroom, and a library/office. This is our basement dream.


We currently have a totally unfinished walk-out basement. It’s plumbed, it’s wired up, and we have a few walls dry-walled. But basically, I say it's unfinished because it has nothing else. Concrete floors and a bunch of boxes.
The basement plans:
  • Family room
  • Giant Wet Bar
  • Full Guest Bath
  • Guest Bedroom/ office & library (aka in-law suite)
  • Extra Storage
We have 1,000’s of ideas for the space. Thanks to Pinterest we change our minds weekly. This is going to be a totally DIY task as we want to spend as little $$$ as possible. 

We're probably going to go a little more rustic with the downstairs style for a few reasons: 
  1. We have a wagon load of free salvaged barn wood we’d like to use. 
  2. We received kitchen cabinets and granite counter tops from my parents’ old kitchen. 
We are planning an eclectic/rustic look to pull it all together.
Sources: 1234

Floors: We are going with a tile for the flooring. It’s easier to keep clean than hardwood, and can handle spills. With a wet bar, and our friends….there will be spills. I want a tile that gives the illusion of warm hardwood. I poked around on Mohawk’s site and came up with the State Point in Stormy Gray. Perfect. I think something like this would look great with the Barn wood accents we want to incorporate like in the top right corner.

Walls: A perfect place for a partial barn wood wall? I think so! I'm sure we will add other rustic touches. Like maybe hang my vintage game board on the wall I scored at an auction! 
Sort of like this pin:
source
Furniture: As for the seating. We want to have a big comfy couch to watch movies. I think seating with a counter behind the couch would be a ideal layout. This way kids can still sit downstairs and eat their snacks and watch tv…without as many crumbs on the couch.  I think it would be also a great set up for buffet style get-togethers!


Ceiling: The ceiling is one of the biggest part of the project we are talking about. We discussed dry-walling the entire ceiling. We do not like the look of the drop ceiling tiles at all. They are spongy and remind us of office buildings. It just not the style we are going for. 
Putting drywall on the ceiling not only takes material, lots of labor, and time, but it also can be a problem if we ever have plumbing issues or electrical problems. All of our pipes and lines need to be accessible. 
So the answer could be: Decorative drop ceiling tiles! Ceilume offers gorgeous drop ceiling tiles, and from what we've seen, at decent prices. We are still calculating the cost difference versus drywall. But if we used something like the Empire Faux Bronze Ceiling tile pictured above, it would add the warmth we want, the rustic, the chic, and the easy access if we need it! How fab would that be?

And now for the most important part of the basement finish: The bar.

Sources: 12, 3
The Bar: We are using barn wood and barn beams as much as possible. Adam has a plan. I have a request for a huge wine rack. Filled with lots of wine. We've been collecting vintage tavern treasures to use in the bar before we even broke ground on the house!

We are using the hand-me-down cabinets and granite counter tops from my parents' old kitchen. They will be our base and exterior of the bar area. Adam plans to build the actual 'bar' from scratch. We're also considering DIY concrete for front bar. But Adam is worried they will be too cold when people rest their arms on the bar. What do you think?


But, one important thing I have to remember during this project is:
This is more Adam’s space than mine. Not that the entire upstairs is my space, but I usually have the final say on what goes on the walls and what we sit on. What can I say? I am a hip home blogger, he has to trust my style choices. (Please note the sarcasm.) But although I will be spending time downstairs in this space, and so will our future chillens, this is going to be Adam’s Space. I am neglecting to use the term ‘Man Cave’ because I feel like things could get a tad out of control…no one wants a Big Lebowski Poster in their hip and cool basement right?


Do you have big plans for your basement?
Does your husband have a 'man cave', do you get to help decorate it?


P.S. I've pinned all of these on my basement pinboard. You should probably follow me on Pinterest if you don't already!
Related Posts Plugin for WordPress, Blogger...
Follow on Bloglovin
Web Analytics