Showing posts with label bathroom. Show all posts

Tuesday, July 26, 2016

A Spa Bathroom by PlumbTile

Our basement bathroom is finally finished. Well, mostly finished I should say. While we’re all waiting on the photographer (me) to take decent photos for blog sharing--sometimes it’s still fun to do a little design daydreaming!  

I teamed up with PlumbTile to create a fun mood board for a dreamy spa-like bath. If you’ve been around Let’s Just Build a House for a while, you know I love incorporating vintage and rustic pieces in every room of my home. The bathroom is no different! It’s easy to get carried away though with all the neat finds at flea markets and thrift stores. It’s all about balance.


Let’s start with the floors. PlumbTile's glass tile & stone  selection is top notch. It was fun browsing the beautiful glass tiles they offer. But for this mood board I had to stick with a natural stone like the limestone. I’m pretty happy with our natural stone in the master bathroom, so it’s an easy choice for this room design. I love the color too.  Oh, and how about the accent tiles below? Wouldn't that be fun to incorporate into your bathroom? They reminded me of my recent vacation to Mexico! I had to pull them into the design for some fun and warmth. We typically stick with a neutral base tone of flooring and wall color, and then pair it with crisp white as accents. It helps to give a clean and spa-like tone. Towels, white linens, and of course the lighting is important!


PlumbTile is really a one stop shop. They have what seems an endless selection of lighting . I’d choose this white and chrome 3 light fixtures over the mirror, with matching sconces throughout the room. My favorite tip is to put your bathroom lights on a dimmer. It’s easy to create perfect mood lighting for soaking in the tub.
That brings me to the tub in this design.  Dream tub. Seriously. A copper tub is truly the showstopper in this design. 

I’d certainly love this beautiful copper soaker tub paired with the marble vanity & sink combo. This brings a nice balance to our rustic items with modern and sleek.  It’s always best to combine a few modern or contemporary touches into your decorating scheme to offset the rustic themes in the room. The gorgeous hand crafted vanity is a stand-out piece. It compliments the soaking tub and rounds out the bathroom design perfectly! Just picture yourself in this room, with a glass of wine, a good book, in that big copper tub!

Do you have a bathroom renovations,  refresh, or renovation in progress or on your mind? 

Sources:
sconce | vanity light | stainless towel rack | marble vanity  |  copper tub | limestone | soap dish

This post was written by me and sponsored by the PlumbTile.com. I was compensated for my time, all opinions are my own.

Thursday, January 14, 2016

Basement Bathroom Progress Report

Even though there is crap everywhere, and the lighting is totally off, we wanted to post an in progress update on the basement bathroom reno.

Last post about the basement bathroom renovation I showed you our work in progress sleek tile floor.


Here it is as it stands today. The bathroom is odd L shaped, so it's awkward to get a good angle. Bear with me.


We really love the floors even more now in all their white grout beauty. Especially after we did all the work ourselves. Which is why it's not perfect. We did save a boat load of money. Although, it came with a cost of just a little bickering at each other in the process and sore knees and backs!


As far as the ceiling goes, we chose these decorative tiles from Menards. They are waterproof, and prettier than the spongy foamy tiles. We chose not to drywall this ceiling in case we ever need to get to the plumbing in the ceiling for this bath, and the master bath, which is directly above this room.
You will see these ceiling tiles in another post, we did something fun with them for a different part of the basement!

I made a decision on the real life vintage farm house sink debacle and ordered the faucet.


This is the faucet we ordered. It comes tomorrow, crossing my fingers it's the perfect fit. We measured 30 times, but since the sink is so old it will be tricky.

Most of our fixtures are Delta, but delta had slim pickins of wall mount options that matched the style we want. Can you guess which one we picked? They both cleaned up so nice, it was hard to decide! I might save the answer for the big reveal.
We can't wait to get the sink installed and the doors and trim up, and of course the stool in place.

I'm still researching light fixtures for this space. I feel like I've looked everywhere and can't find the right ones! Sometimes I just get something in my head and can't settle!

Where do you shop for light fixtures?

Monday, December 7, 2015

Basement Bathroom Vintage Farmhouse Sinks & Sleek Floors

We've been making decisions left and right in the basement bathroom. This bathroom is getting whipped into shape this winter, with the rest the basement closely behind. As soon as we get the tile complete, our plumber can install the stool, and the sink. Oh, the sink---we'll get to that part soon. I need your help.

First, let's talk about floors. We're currently this far on the floors:
Excuse the blurry Iphone picture, and the mess.  This was an in-progress-shot. It's only been set. Adam still has to grout this week.

We purchased this tile from the Home Depot.
Marazzi VitaElegante Bianco
As you can see in my iphone photo above, it's much more beige than white. We're going with snow white grout lines. This bathroom won't have a window and it's still a basement bathroom, but we want it to be as light and clean looking as possible.

And now the sink debate.

We have two old junky let's say ~vintage~ sinks currently sitting in our basement. They're not in the best shape, obviously.  These old sinks were once used in Adam's Grandpa's farmhouse...they've been sitting outside in the shed for years and years, until one day, we did a big clean up day...and they were headed for the dumpster.
Adam probably annoyed that I made him haul two old junky sinks home on clean up day.
But, you know me....I can't let a vintage find like this be trashed. So in the back of the jeep they went.


The rust does come off, and I have a call into our plumber for help with switching out the faucets too. My plan is to use one for the laundry room, and one for the basement bathroom.

Adam so nicely hauled them right into the bathroom so I could see how the colors looked.  Right now I like the white, but the green would be sort of fun and eclectic, maybe?

So, green or white? Help!!

See our other basement finish updates:

Wednesday, November 18, 2015

Basement Bathroom Shopping with Plumbtile

We’ve been busy working on our basement finish this Fall, and have big plans to get a large portion of this project finished by Spring. As I’ve mentioned before, we’ll have a family room which includes a wet bar, and a guest bedroom/office complete with its own en suite bathroom in our basement--once everything is completed.

The plan is to finish the bathroom first—and so far we’re right on schedule. Since we plan to DIY most of this part of the project ourselves, we can get a large chunk of the job done while waiting on our contractor to do his part.
I think the best part of working on a whole room finish from scratch (besides it being done, of course!) is researching, shopping, and daydreaming about all of the possibilities.  

I compiled a collage of different items from PlumbTile in my search for the bathroom design. I’m not sure how to categorize what style I’ve come up with. I’d like to think it has both a modern and vintage appeal.


I’m loving that teal turquoise herringbone tile. It makes a statement, and feels both vintage and new, with a hint of eclectic! We’ve got big plans for the bathroom sink, but this one on PlumbTile was speaking to me. We don’t have a huge space for the vanity in this bathroom. This sink feels sleek and space-saving but not tiny. It has the vintage appeal we’ve got going on throughout the rest of our home. I like old things, and new things that look old!
I'd top off the room with a fun mirror like the one I chose above. It reminds me of old wood trim in Adam's grandparents farmhouse.

Of course, if I had an unlimited budget a bathtub like the one in my design board would be the star of the show. Unfortunately, I don’t think we’ll be going with one this fancy, but a girl can dream right? Imagine soaking in this beauty.


Do you have a bathroom renovations,  refresh, or renovation in progress or on your mind? Check out Plumbtile for your home improvement needs and start dreaming!

This post was written by me and sponsored by the PlumbTile.com. I was compensated for my time, all opinions are my own.

Monday, January 20, 2014

House Tour: Master Bath

Did you think I forgot about the house tour? I mean, we’ve only lived here a year and I have only shown you half the house! I don’t really have an excuse, I just felt like posting other stuff. So let me stop rambling and show you the goods.

Usually when I walk into the master bath this is what I find.

This is his lookout spot.


See that dark cave-like room back there? It's our shower. Let’s all just pretend we aren’t missing the shower door. Since it is pretty deep and water doesn't get out when the shower is on...we aren’t in a hurry to drop a pretty penny on some glass door that we will have to clean anyway. Custom glass shower doors are not cheap. It’s on the list.
And yes it does feel like you are showering in a cave!

Step inside the cave...
Body jets. We have 4 of them. The nozzles twist and there are different pressure options too.This is one way to up your shower experience. They are pretty darn nice.
The floor looks like it's a different color, but it's just the lighting, it's the same as the rest of the tile, just smaller.

We do have a small corner bench.

That my friends, concludes our cave tour!


And there he goes again...back on the clock as security guard. Always on the lookout.

On the windows we have faux wood blinds from custom cut by Menards in the store.  The curtains were also picked up from Menards. They are white tie-up curtains.
In the corner, I added some candles. Obviously essential for a serious spa-like relaxing bath.

Vanity space:
Pretend you don't see the smudged on the mirrors...
Our vanity is actually two 48 inch vanities side by side and secured. We added a custom marble countertop so we would each have our own space and sink. We share the hanging cabinet for other bathroom essentials.

This is my corner:
I keep my makeup brushes in a few of my milk glass pieces. I think the milk glass goes nicely in the room and plus it makes me happy.

And the throne has it's own little closet for extra privacy.

The tile is a stone tile.  It has a natural look and feel to it. Completely our style. We love the look and the feel of it... however, we do wish would we would have done heated floors in here, because it is COLD in the winter.  Darn it.

We had someone else do the tile work as we were newbies and needed the bathroom to be done ASAP so we could move in. I do not recommend our tile guy to anyone. I won’t give his name. I will just say during our last phone conversation the man screamed at me, then hung up on me. As Stephanie Tanner would say. How rude. 


Oh did I forget to mention the TV? Yep, husband installed a TV for me. It's on a tilting mount so it can be turned to watch from the vanity as well. But it's mostly used while relaxing in the tub. I can watch HGTV while soaking. And I do.

My chill out routine:
  1. Light candles. 
  2. Dump in 3 capfuls of bubble bath.
  3. Turn on HGTV or Will & Grace reruns.
  4. Pour a big glass of wine.
  5. R-E-L-A-X.

So there is your master bath tour. I love the color scheme of the room. Neutral, relaxing. Spa-like. Everything I wanted in a master bath. It's not completely finished yet. Obviously a shower door is on the list. But we also have nothing on the walls except the towel bars!

Sources:
Wall color: Sherwin Williams-Bittersweet Stem 7536
Light fixtures: Menards. They match the light fixtures in our upstairs guest bathroom and the powder room.
Faucets: Delta Faucet: Venetian Bronze ordered from our super awesome plumber. 
(If you are local to Effingham, IL area Tebbe Plumbing is the best plumber, hands down!)
Cabinets: Masterbrand Cabinets purchased for a deal at Cabinet Factory outlet, Arthur IL. We bloggers about our experience at the Cabinet Factory Outlet in Arthur here.
Countertops: Marble in "bone" Classic Marble of Arthur, IL.

See the rest of the House Tour!


Does your pet have a goofy "spot" in your house?
Do you have a favorite place in your house you go to relax?

Wednesday, January 15, 2014

Master Bath with a "spa" theme: down to our tooth brushes {{sponsored post}}

Disclosure: I received this product as part of an advertorial.


Oh you want to see more of the house? What about the master bathroom? We will be sharing that room soon, but first I will share our newest master bath accessory. Consider this your sneak peek...
Wamboo toothbrushes perfect fit with our vintage accessories. 
When we were planning out our master bathroom I wanted a spa-like feel. I had to have the big tub. Husband had to have the big shower with the extra jets. The color scheme was important too. Neutrals, to keep a natural theme. We try to keep our accessories in the spa theme with just a touch of vintage. You know us, just keeping it real. Also I spend a lot of time in thrift stores. 

So, when Woobamboo sent us 2 of their  Bamboo toothbrushes to try out, I was all for it. Free toothbrushes? I like clean teeth. I have to buy toothbrushes anyway every couple of months. I will try them. (Read: I love trying things out that I would normally buy anyway. If anyone wants to send me free dog food or toilet paper, I will take it gladly.) 
Bamboo to me sounds like it would be in spa, am I right? They are also eco-friendly, which is something we are down with.

Woobamboo boasts:
“WooBamboo Eco Toothbrushes are a stylish and eco-friendly alternative to the typical landfill-cluttering plastic toothbrush. They are made with bamboo that's sustainable, organically grown, biodegradable, antimocrobial, and panda-friendly!”

Woobamboo is even pretty to look at!
Now, they aren’t just a stick with some brushes on the end. No Sir. They are customizable! You can order them with something etched on them. How great would these be for a dentist to giveaway? I wish my dentist would give me a toothbrush this pretty.
Not to mention Woobamboo toothbrushes are antimicrobial, organic, BPA free, and bio-degradable.

Brush test: The bristles were soft, but still felt like they were doing the job. I have sensitive gums and they didn’t hurt them at all.  They sent us an original and the slim. Mine is the slim, because Adam's hands are much larger than mine.


To top it all off, I think they look stylish in our “spa” master bath…which I will share more of next week! Really, more room tours are coming so soon! Stick around!


*EDIT* See the rest of our Master Bathroom as promised! 

I received one or more of the products mentioned above using Tomoson.com. Regardless, I only recommend products or services I use personally and believe will be good for my readers. All opinions are my own.

Thursday, September 26, 2013

1/2 bath update and a feature!

Remember our DIY old washstand dresser I turned to ½ bath vanity? It was featured this week on Furniture Flippin’! How flippin exciting right?

The feature reminded me… I updated that bathroom a tad more since I last showed you. What kind of blogger am I, I do things..and forget to even show them off.

This is how the bathroom looked last time I shared...
Dresser to Vanity
Adam has been on me to hang things on the walls. Which I have a hard time doing since we paid so much $$$ to get these stinkin' walls smooth, and it took so much time! I have been extra picky and using Gabbi’s recommendation of using the 3M sticky strips whenever I can. It was time to get some art in that bathroom...

My inspiration...pink balloons and the Illinois River...
our engagement spot.
Lover's Leap, Starved Rock State Park, Utica IL

I ordered a stack of vintage postcards from Starved Rock State Park from the 1950’s for about 7 bucks on the wonderful Ebay. Starved Rock State Park is special to us. It’s the spot where Adam asked me to be his wife with gobs of pink balloons. We also held our wedding reception there. It’s lovey dovey stuff without all the hearts and kissy photos in your face.
Starved Rock & Wildcat Canyon postcards. Starved Rock State Park, Utica IL.
 I purchased a few frames and some mattes at Hobby Lobby and up they went!
 And guess what, we took a chance and actually DRILLED HOLES for this! Yipes. But we love it.
baskets thrifted.  The one on the toilet still needs spray painted.
Super fake lavender plant is Ikea,
This one is Lover's Leap at Starved Rock. Our engagement spot.

It keeps with the vintagey feel of the room, but still has something with meaning to us. Plus, they were super inexpensive. The darn frames were more than the stack of postcards I bought. I suppose I could have scouted the thrift stores for truly vintage ones, but I wanted them to match, and I’m impatient sometimes most of the time.

Read about our DIY flea market dresser to bathroom vanity.
Bathroom paint color is Sherwin Williams Dormer Brown 7521


Have anything secretly lovey dovey hanging in your home?
Have you ever hiked Starved Rock State Park?

P.S. If you haven’t already checked out Furniture Flippin’ you should now. This girl flips her own stuff, and features everyone else’s flips too! She is too sweet and pretty darn funny too. SUPER BONUS: she is also from the Illinois Valley, just like me. So I double-triple-quadruple like her.

Sunday, December 16, 2012

DIY: Dresser to 1/2 Bath Vanity

Last week I shared with you our DIY rustic farmhouse table. Today, I have another DIY project to share. This time, the half bathroom vanity sink. This guest powder room is so tiny--our first thought was to go with a simple pedestal sink.

Then, we picked up this old dresser this summer at my favorite flea market the Third Sunday Market in Bloomington, IL.

50 dolla holla.

We paid fifty bucks for it. It was marked $65 so we did talk him down a few bucks. It was in rough shape. Grimy too. 
It was the perfect size, and I loved the floral design on the little door. I'm not even a floral design kind of girl, but for some reason this seemed to be less grandma floral and more chic floral...idk

Sanding and filling nail holes is not my favorite.

Someone had beat this thing up, it had nail holes in the top, and scratches and dings everywhere. I filled the nail holes and sanded it down.
I applied few coats of Minwax Special Walnut, and a few coats of poly to shine it up and protect it.

The sweet drawer pulls were removed soaked in hot water to get the nasty sticky gunk off. Then I gave these babies a few coats of ORB to match the rest of the hardware in the house.
Much better in ORB.

We purchased a vessel sink and faucet off of Ebay. I did get a hell of a deal on this sink. I won the bid on Ebay for 80 bucks including the shipping. The sink alone retails for $400!


And the below photo shows the true room color. Sherwin Williams 7521 Dormer Brown.

The light fixture is from good old Menards.
Completed with a mirror I've had since Jr. High. My grandma gave it to me for Christmas or a birthday and I had it in my bedroom at home and even through college. I did sand down the original finish and put a coat of our favorite Minwax Jacobean on it.

1/2 Bath. Finished!

Dresser $50 flea market find
Sink $80 winning bid on Ebay
Faucet $40 Ebay

Under $200 bucks on my very own one of a kind custom vanity!

What do you think of our vanity? Is it your style?
Have you ever shopped at the Third Sunday Market in Bloomington, IL? Deals?
Do you shop on Ebay?

Friday, November 30, 2012

Guest Bathroom reveal (so far)

Our full guest bath is the first left on the second floor.

First door on the left...
This will just be a guest bathroom now, and will later be for kiddos. The bathroom is not large at all, there is plenty of room for a 48inch vanity a stool and full size shower/bath combo.

Now that I see the wall color on the computer it isn't right, yet again.
For this room we used the wall color Sherwin Williams Bittersweet stem 7536. It is basically just a tan with a hint of brown, not the yellowish color my lack of camera skills shows here.

Our shower curtain is from Amazon. Again my lack of camera skills does it no justice. It is pretty and actually kinda girly in person (but Adam didn't seem to care so it must not be too feminine). But I wanted something simple with a little style since I wasn't sure what color accents I wanted to do so I stuck with white.

We just used a vinyl tile from Menards on the floor here. We will probably put a nice ceramic tile down at some point, maybe even to match our master bath. But a big reason we did this is because this would be our only bathroom for almost a month! So we needed to get it done fast in order to move in.

Vanity.
We just went with the *GASP* regular old builder mirror for now because I couldn't find one large enough for the 48 inch vanity---well that wasn't fug. Sometime this winter I plan to frame it out to make it pretty.

Delta faucet in Venetian Bronze
All of our faucets in the house are from Delta in Venetian Bronze finish. Our vanity countertops are made from Marble in the the color "bone" . We purchased them from a local company in Amish land called Classic Marble of Arthur

We still are waiting for our electrician to come back sometime soon to finish up the rest of the fixtures in the house, including the vanity lights. Once we have those in I will show them off because I am loving what I have picked out.


Happy Friday! What do you have planned for the weekend? We are working on the house and hopefully sleeping in or taking an afternoon nap! I Know....party animals.

Monday, August 20, 2012

Master Bedroom dreaming.

I am dreaming of my master bedroom.
We will finally have a big enough bedroom for a king sized bed.
Plus, two night stands!
And we will have ample closet space, so I don't have to live out of laundry baskets and Adam's clothes can be on the floor of his closet instead of the floor of the bedroom!
And also, our walls don't have to be white.

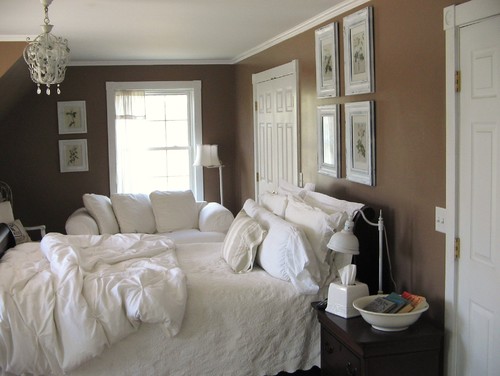
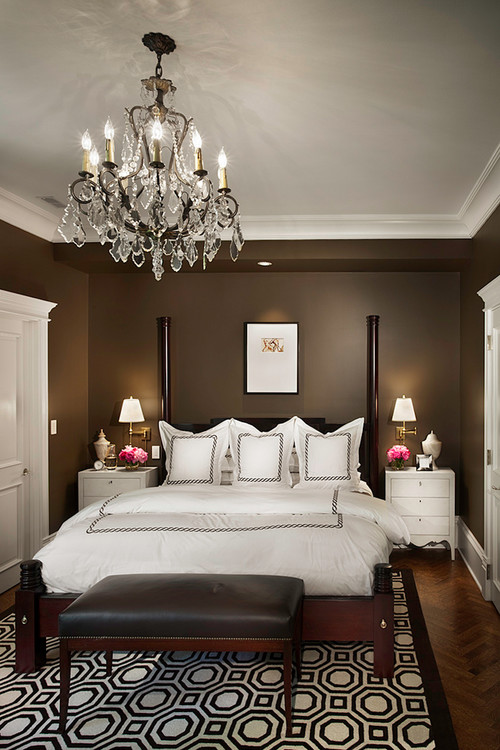
We went with a rich brown color for the master bedroom walls. (forgive me, but I can't remember for the life of me the name of the darn color swatch---I'll figure it out when we show it to you on the walls)

Some of my inspiration...
Via Houzz

Via Houzz
Via BHG
The color we chose is sort of in between the first two colors. We wanted our room to be cozy, warm, and relaxing.

For the master bathroom, we went with just a lighter shade of the bedroom color.

What do you think? What accent colors do you suggest? I love the look of whites and creams but I need a little color to spruce it up too. My mother suggested turquoise.

Monday, June 25, 2012

bathroom cabinets

We purchased our Master bathroom vanities and our second floor bathroom vanity last weekend.

Have you heard of Schrock or Masterbrand Cabinets? Well, there is a "cabinet factory outlet" warehouse about 45 minutes from where we live.  Basically, they have a whole boatload of overstocks,  cancelled orders, etc for wholesale pricing open to the public.

Cabinets cabinets everywhere.
 And so we walked around two large warehouse rooms full of cabinets for about an hour. We had no idea what we were even looking for except we wanted a vanity for the master bath, and one for the second floor bath. They didn't necessarily need to match, but we wanted them to blend together.

The problem with the warehouse is that cabinets are scattered everywhere. Wall cabinets, pantry cabinets, base cabinets....everywhere. Hardly in any order. And walking through a maze of cabinets you get a little confused.

But, luckily when we were at the warehouse we were the only ones there so we had a little extra attention from the staff. They helped us find matching cabinets. And even loaded them up for us.
One piece loaded up.

We ended up with matching for the second floor bath and the master bathroom. The master bathroom vanity is going to be huge. Eight whole feet of vanity so that me and Adam never again have to share a small 3 foot vanity to get ready. Honestly right now we are both so crabby in the morning because we have one tiny bathroom to get ready.

We also purchased a 48'' vanity for the second floor bath. Now, the second floor bath is probably going to be a little tight, but it's just going to be a guest bath for now. Later on, it will be a bathroom for our someday future cutie kids. We almost purchased a smaller vanity. But I reminded Adam that what if we have like 3 girls? Where will they all brush their hair and apply glitter eyeshadow that they purchased from Claire's before the Jr High YMCA Dance?
So we opted for a larger vanity with a slightly more cramped layout. Thinking ahead we are.

We are all about deals at our house. We will probably end up spending more on the countertops/sinks than we did on the cabinets! But this way we can stretch our budget in other parts of the house.


Do you like searching for deals? Did you apply glitter eyeshadow before your parents dropped you off at the YMCA dances? You need vanity space for that!


Related Posts Plugin for WordPress, Blogger...
Follow on Bloglovin
Web Analytics