Showing posts with label table. Show all posts

Friday, November 13, 2015

Dinner Party: Serving Wine...Only Wine.

I've never did the ~holiday tablescape~ thing before.  To be completely honest...I do sort of think it's a tad crazy to set up a fancy table setting just for pictures on the internet. Maybe some people really have people over after they set this all up and enjoy an elegantly styled dinner and drink fancy sounding drinks. They maybe even use those cute paper straws--and maybe they don't get soggy.

Today, I officially join the other bloggers in the crazy club--errr imaginary guest table.  My mother-in-law was cleaning out her basement and gifted me some old white tableware. Plus, I had an entire day off to myself this week. Adam worked and Ben went to the sitter. I caught up on laundry, gave Scout a bath, watched reality tv (90 Day Fiance anyone?), and then had a little extra time to spare.
Sooo there I was, setting the table for non-existent dinner guests with no fancy dinner cooking in the oven--and no plans for cocktails out of chic straws that evening.

I don't have anything to serve. Except sweet potato puffs, and wine. I always have wine.

But check out this lovely fall view of Bishop Creek.

Maybe take it all in while you enjoy a glass of Bishop Creek Wine? See what I did there?


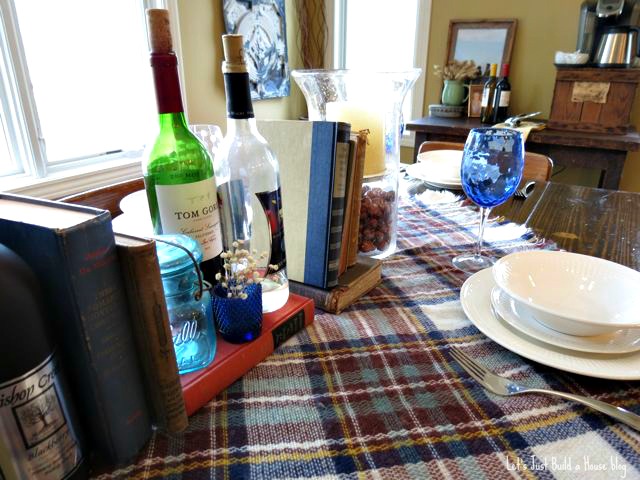
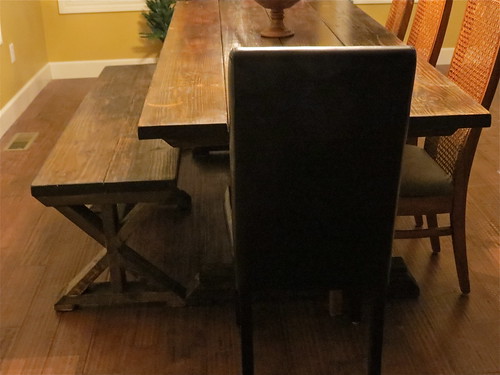
Let's talk a minute about the blanket scarf. Every blogger in blog land seems to have one of these blanket scarves in their fall tablescape. They also seem to be wearing them all over fashion blogland. My blanket scarf is so soft, snuggly, and I love the print. But to be honest, I have not worn it more than 5 minutes. It's HOTTER THAN HECK. I mean this thing is H-O-T. I immediately have a sweat mustache about 90 seconds after it's draped over my shoulders. It does better as a little blankie on the couch, or draped over this table to be honest.

Have you ever set up your dining table with no dinner plans? 
Does your blanket scarf do more good on the couch or the table than on you?

P.S. In some of the photos above, you can see a sneaky peek of my new chevron jute rug. See more of it here. I'm loving it!

Thursday, October 31, 2013

Updates and decor in the dining

If you've been around awhile you have seen my dining area and our DIY farmhouse table before. If you are new here. HI! Make yourself at home!

Our dining room is really just the other side of our large kitchen. We did not want a separate room, we opted for a more open feel. 
I have been slowly adding a few touches to make it feel more like a home, and less like we just moved in and are sticklers about putting holes in our walls…(fyi: We are still sticklers about holes in the walls..everything on the walls in this post are hung up with 3M strips, hah!)


In one corner, I have a small accent table I purchased online with some rewards points from Kmart. The table is new, but everyone thinks it's another one of my flea market antique finds! 
It currently holds my backup supply of vino. I styled the table with a few old books and a candle holder filled with all the wine corks we’ve corked since we’ve moved in. Don't do the math. If you did the math don’t judge me.  The candle and vase were some of the centerpieces at our wedding reception, so it’s secretly sentimental. 

I added a thrift shop find wine pairing guide above.

The other end of the room is my china cabinet I picked up for a cool $25 bucks at an estate auction a few years ago. It needs a little work, and I originally thought I would paint it. But right now I like it the way it is. Next summer I plan to give the insides a little makeover. Unless I find a different piece to put here. At $25 dollars, I think I've gotten my money's worth and wouldn't feel bad about replacing it with a larger, taller, more "me" piece.

It holds our stemware, bar ware, and a few vases and pretty pitchers.

My lantern collection sits on top. I wanted a little more height so opted to add an old military green file box under a couple. The candles in them are battery operated…shh. They look pretty at night. And when I decorate for the holidays I will stick some Christmas-y garland in there to add to the ambiance.
Lanterns are from Marshall's and Gordman's
Next to the china cabinet is one of the newest additions: 
old ceiling tiles as wall decor.
These old ceiling tiles were a flea market find with my mom a few weeks ago. We actually dug them out of a bin under a wet tarp. Rusty edges and all (it’s fine, I got a tetanus shot last year after I cut my arm on a crusty old mirror) I also took precaution and sprayed these heavily with a clear coat of flat paint. Just incase some of the leftover paint layers contain that yucky harmful lead stuff.
old ceiling tiles, sprayed with a clear clear coat, and displayed.

I covered my mismatched chairs with duck dining room seat covers I ordered from Surefit. They don't photograph as nice as they look in person.
I ordered them in the "Natural" color. I plan to spice them up a little this winter. (I have so many DIY plans…let’s see how fast I get these done!) I wanted a little more texture, and Adam has always hated the look of hodge podge chairs anyways so these seemed like an inexpensive and quick change. 


Scout finishing up a snack in the dining room...
And the best and newest part of the dining room... The rug! It is the Santa Ana Symphony Ikat rug from RugsUSA. I ordered it when they were having a 65% off sale Columbus day, it came the following week. I love it. It was originally $600 and I got it for under 200 bucks. I think that’s a great deal. It’s plush under my toes and I especially love the gold and maroon hues. All the colors are pretty true to the photos on their website. I'm super pleased with this purchase. 
I vacuumed it before we set it up, and it hasn't shed at all. Scout also approves. He likes to nap on the corner while we are in the kitchen cooking/chatting.

Adam on the other hand questioned why we need a rug under the dining table at all. I explained it is to anchor the room. Apparently that meant nothing to him by his expression...men.


DIY Farmhouse bench on the new rug

DIY Farmhouse table & bench with Ikat Rug.
I'm still on the hunt for the perfect sheers/drapes and also a way to hang them. The window is 10 feet wide darn it! 

See more about our DIY farmhouse table and bench.
See more of my kitchen here.
Paint color is Sherwin Williams Restrained Gold. (although not all the photos do the color justice)


*p.s. This is not a sponsored post by any means, I paid for everything in the room..I'm just labeling and linking back to items that I can for readers!*

Tuesday, October 8, 2013

DIY Simple Patio Table Revisited & reader build!

Remember our DIY Simple Patio Table Adam built this Spring?


Welllllllll, a reader from Florida emailed me a photo of their version of our easy DIY Simple Patio Table!


Kristin says: "Thank you for the table idea.  We built it yesterday and I love it.  We couldn't find a 4x4 that wasn't pressure treated, so we have to wait to stain the legs, but other than that, it turned out great.  We attached the legs with 4 L brackets/leg.  We were having trouble getting the legs to stay on, but the L brackets did the trick."

Doesn't the rest of her deck make you want to see more too?! I see drapes. I love drapes on a deck!!

Thanks Kristin for emailing me. Adam was especially excited. It turned out wonderful! Enjoy!

We love our table too and purchased a set of 6 chairs to go around it. I really need to get an updated photo on the blog for you guys to see.

Read more about our DIY Patio Table build here and here!

Have you built furniture you've seen on the internet?
Now I want drapes on my back deck...

Friday, March 29, 2013

DIY Simple Patio Table Details

I promised you the plans to our DIY patio table this week...


But I lied. You are not getting them today. Turns out, Google SketchUp takes some time and patience. And I have neither lately. 

Plus, I have been putting in some extra hours at my real life job this week. (It is month end gahhh!) So really, all I want to do is come home and have a big glass of wine after work. So sorry. No plans, just details for now.
I will probably finish the plans up and post them at a later date. 


Honestly, it was a pretty simple build.  If you are even a little handy you can probably look through these photos and figure it out...we just made most of it up as we went along.
Took less than 2 hours, and $60 bucks---including the stain! 


Materials used
Seven salt treated 2x6's
Four salt treated 4x4's
One salt treated 2x4
Thompson's deck and patio stain in "banjo brown"

Total cost: $58.00


This is the making it up part happening right here...me telling him what I do and don't like and Adam telling me if it is really even possible...most of my ideas were apparently redic. I do understand furniture building.

and now some measuring before the cutting..


 Here we (FIY: when I say "we" in the this post it really means Adam)  sort of made a frame around the bottom of the table top. This would give the table a much smoother look... dress it up a tad.


Adam cut up a 2x4 and fastened them to the underside of the table top. This will secure the boards so they won't shift later with any weather conditions. Although they are salt treated for all weather...you never know.


 Now the legs!

you can see he secured the legs by cutting up more of the 2x4. Just to stabilize them a bit.


After 2 long hours of hard labor...the build is finished and time to test it out with a brew.
Scout is considering making it his new cave.


 And finished up with the stain. Which took about 20 minutes. One coat ONLY with this stuff.

Do you plan to build something for your patio? I think I want a matching bench…what do you think?
Is your office/work super busy at month end too? My.brain.is.fried.
Big Easter plans? We have a treasure hunt happening at my parents’ house. More on that later..

Monday, March 25, 2013

Simple DIY Patio Table reveal

My handsome husband is a better handyman than I gave him credit for. One Sunday afternoon we were  looking at patio furniture and wishing our tax returns weren't already budgets to go towards our pesky student loans. We loved some of the big solid patio tables, but didn't like the price. The ones we really loved were at least $300, if not more.

Then Adam had an idea. Let's just build a house patio table!  So for about $50 worth of salt treated lumber, and about 2 hours of work on a Sunday afternoon. We did.

Here she is all stained and in her new spot. I didn't even wait for it to dry before I took the pics...as you can probably tell.


We plan to get different chairs of course---but these old chairs I picked up at estate auction a few years back are just fine for the two of us now.


 And now if we can get rid of this snow AGAIN, we can enjoy it and our view!


 How to, plans, and details coming this week, stayed tuned!

Tuesday, January 8, 2013

DIY Rustic Farmhouse Bench

And now we have a place to sit...


One afternoon I came home from work and there was a bench ready to sand & stain...

It took him just a couple of hours to build. He used plans from Ana White's site just like we did last month when we shared our DIY Farmhouse Table.

It's perfect.
Actually everyone who comes over now says "it's so big!" Well, who wants to have half your butt hanging off the bench while you are having dinner? (we do not have tiny buns in this house...) Not me, so we made it larger than the plans called for. And longer, because our dining area is a pretty large area.


Right now we have kind of a hodgepodge of chairs going on. I sort of like it, but have a few changes in mind, and am on the lookout on craigslist & auctions.

I wanted chairs on one side and also on each end. Do you think we need a bench for the other side too? I vote chairs. Adam votes bench. Scout also votes bench.

Close up shows the slight color difference.

It took us about an hour to sand & stain it. Then of course a few coats of poly.
To stain it, we used a mix of Classic Grey & Jacobean by Minwax. Although, this time I added a little more classic grey...so the color varies from the table by just a tad. Oh well.


What have you built from Ana White's plans? 
Do you think we need a bench for the other side or stick with chairs? 
Do you mix your stains to get the look you want? If so do you always measure correctly? I just kind of throw stuff together. oops.

Monday, December 10, 2012

DIY Rustic Farmhouse Table

We had a busy weekend planned. We had big plans to finish up the coat closet and linen closets, and to get a start on designing our master bedroom walk-ins...well, didn't happen.

We've had the start of a project that kept getting moved lower and lower down the list just sitting in our garage.  Saturday morning we decided we wanted to sit at a flipping table and eat dinner again. So we finally finished what we started...

sanding away this summer...
Adam actually started on the table this summer when we saw the plans on ana-white.com , but we had so many other projects the finish work was put on the back burner..until Saturday morning.

Before we applied any stain, we took a few odd shaped tools and even a chain and beat the crap out of it. I mean really beat the crap out of it. It's fun take some "house building stress" out on a table when contractors (AKA TILE GUY & CABINET INSTALLER DUDE) are screwing shit up left and right. But back to the table...

please excuse the disaster of a garage and the poor photo quality of the iphone cam..
 Minwax stain
The finish is leftover stain from our staircase. The color is Jacobean by Minwax. We also mixed in a little Classic Grey also by Minwax. I would say it was 2/3 Jacobean.

We applied a thick coat and rubbed it in with an old rag a few minutes later. Then repeated.
We finished with a couple of coats of Minwax poly for a little shine and protection.

Moved it into the dining area...still drying!
We couldn't wait for it to dry to bring it in, so with the help of Adam's dad, walked it around the entire house and up the back deck steps to get it inside. It is too large to fit through the garage entry door.

Still drying...but I couldn't wait to post the photos!
It needs some touching up and is no way perfect. It is only a temporary table--someday this will move to the back covered deck, or to the basement when it is completed. But it is perfect for us right now. At least we can sit at a table and eat our dinner together! 
Adam did a great job building it for me and we had fun finishing it up this weekend too.


Plans can be found here. Although we changed ours a tad so it isn't super exact.

Now for some seating...
...also I am on the lookout for a new hutch or buffet. The one you see in this photo was a $25 estate sale find, and does the job, but doesn't really fit the look we are going for. Plus, it looks so tiny in this house!

PSSSTT...you can see more of our builds and projects right here
Related Posts Plugin for WordPress, Blogger...
Follow on Bloglovin
Web Analytics