Showing posts with label kitchen. Show all posts

Friday, October 16, 2015

Flea Market Flip: Sifter Screen Message Board

Remember this sweet 2 dollar find from the flea market earlier this week? Well, when I bought it I knew exactly where I would put it...

RIGHT HERE. In this weirdo shaped wall in my kitchen.

I had planned to put a plate wall here. But then I got lazy and could only find ugly grandma plates at the thrift store. Not even cute grandma plates.

One nail, and a few magnets...

And now I have a nifty bulletin board for the kitchen to post pictures and recipes.

Pretty snazzy for 2 bucks and a pack of magnets, don't ya think?

I love the old rustic patina and the detail of the label holder on the bottom. $2 bucks and 2 minutes. I love it. My kind of flea market flip!
I'm still not sure what this thing is, some sort of sifter screen.  If you know, please share!

Friday, May 2, 2014

Plan for Plates

When your husband says to you every week:
  • "Start hanging stuff on the wall!" 
  • "What kind of junk are you bringing home now?"
  • "You are trying to make this house look like #&$*%@& Pottery Barn!"

It CAN get annoying. Especially when you are just trying to do what he asked demanded you in the first place. To start hanging stuff on the wall!

I think he's tired of staring at blank walls. But I'm kind of picky about putting holes in the walls at this house. He was too...but now he's over it!

Well I'm working on it. I finally made a decision about what I wanted to do with this odd shaped teeny portion of a wall that we just had to have to hold the second story up and all...


On the living room side of the weird wall I stuck a big old vase with sticks in it. Done. Love it.

But the kitchen side was a different story all together.
Does it have to be something kitchen-y?
What kind of decor can I put on this tiny little space that I won't hate?
Can I find something that I can DIY or makeover so it doesn't cost a fortune?

In comes plates....
They looked so cute at the thrift store. But what would I even do with them? Then I had a little pin-spiration!

These were each less than a buck each. I plan to do a little collector wall hanging! I want to incorporate these colors, but many more. I'm on the lookout for some with teal, green, red....maybe even some plum toned purple plates if I can track a few down.

My inspiration:
 Kelly @ View Along the Way
Love what Kelly did with her plate wall. I like the way it wraps around the side. Which is what I plan to do! I think Kelly shows us that you can make any design with the plates you want. Fit it to your own home. Love that.


I like this mix of old and new styles...
HomeEdit
This collection wall from CasaSugar is interesting because the plates slightly overlap in some spots sort of like Kelly's. It's different and makes it more of one piece rather than several plates in a collection.
CasaSugar

Do you have trouble committing & nailing things to the wall? 
Any tips for a non-picture hanger committer? Do you have any collections on your wall?


p.s. please go to the original source before you pin any of these and pin from there! Thanks!

Tuesday, April 29, 2014

Dumpster Diving: Trash to Treasure

I knew this friend of mine was a good pal already. But when she told me she had a present for me....and it was in her trunk...and it came from a dumpster....because it just "Looked like something you would like!" I just knew she was a keeper!

Someone was remodeling a building in my sweet friend Lora's neighborhood. She snooped in the dumpster and she her fiancee rummaged through and salvaged a few items. Lucky for me, one of them reminded her of me.

And so in her trunk it went, then into mine!


This may look like trash to some...

 But a little soap and water, plenty of lysol, with a wipe of of Old English to add some moisture back into the wood, it had a new home.

Sure, it's not pristine, and it's weird shaped. It probably was just used to store tools or something. But I really dig the shape and color for some reason. Plus, it kind of reminded me of a rougher version of the Garrity Modular Cubby from good old Pottery Barn:


Maybe the PB Cubby's ugly step cousin?

My bunny of gold fit in nicely in one of the cubby holes...but Easter was over, so it was time for this little rabbit to get boxed up until next year.

Don't get upset with his replacement. I think you will approve. I replaced the bun with booze.

Although I really love my $25 estate sale china cabinet. It's not as tall as I would like. Someday I plan to replace her with the perfect estate sale find. Or if I can talk Adam into it,  a DIY build. 

This new salvaged wine cubby brings a little height to the cabinet, and doubles as storage.

I added old books from sales and thrift stores, a little chalkboard frame, and the wine. Needs more wine I think. Never enough wine.

In the top corner I added my collection of driftwood I picked up on the beach at Gulf Shores this year. I decided on driftwood instead of seashells this beach vacation! Something different.

This mint pitcher was my Great Aunt Katie's. The little blue jar was in a mystery box of stuff from an estate auction.

I think the weathered look on the side is my favorite part! The piece also looked good turned the other side for a different look. I may try that for a change sometime.

I'm still deciding if I should add something on the very top. Or will that make it look cluttered? Maybe 3 potted succulents?

Would you add something on top or will it look to cluttered?
Are you a dumpster diver?
Anyone else find something you just LOVE in someone else's trash?

Thursday, October 31, 2013

Updates and decor in the dining

If you've been around awhile you have seen my dining area and our DIY farmhouse table before. If you are new here. HI! Make yourself at home!

Our dining room is really just the other side of our large kitchen. We did not want a separate room, we opted for a more open feel. 
I have been slowly adding a few touches to make it feel more like a home, and less like we just moved in and are sticklers about putting holes in our walls…(fyi: We are still sticklers about holes in the walls..everything on the walls in this post are hung up with 3M strips, hah!)


In one corner, I have a small accent table I purchased online with some rewards points from Kmart. The table is new, but everyone thinks it's another one of my flea market antique finds! 
It currently holds my backup supply of vino. I styled the table with a few old books and a candle holder filled with all the wine corks we’ve corked since we’ve moved in. Don't do the math. If you did the math don’t judge me.  The candle and vase were some of the centerpieces at our wedding reception, so it’s secretly sentimental. 

I added a thrift shop find wine pairing guide above.

The other end of the room is my china cabinet I picked up for a cool $25 bucks at an estate auction a few years ago. It needs a little work, and I originally thought I would paint it. But right now I like it the way it is. Next summer I plan to give the insides a little makeover. Unless I find a different piece to put here. At $25 dollars, I think I've gotten my money's worth and wouldn't feel bad about replacing it with a larger, taller, more "me" piece.

It holds our stemware, bar ware, and a few vases and pretty pitchers.

My lantern collection sits on top. I wanted a little more height so opted to add an old military green file box under a couple. The candles in them are battery operated…shh. They look pretty at night. And when I decorate for the holidays I will stick some Christmas-y garland in there to add to the ambiance.
Lanterns are from Marshall's and Gordman's
Next to the china cabinet is one of the newest additions: 
old ceiling tiles as wall decor.
These old ceiling tiles were a flea market find with my mom a few weeks ago. We actually dug them out of a bin under a wet tarp. Rusty edges and all (it’s fine, I got a tetanus shot last year after I cut my arm on a crusty old mirror) I also took precaution and sprayed these heavily with a clear coat of flat paint. Just incase some of the leftover paint layers contain that yucky harmful lead stuff.
old ceiling tiles, sprayed with a clear clear coat, and displayed.

I covered my mismatched chairs with duck dining room seat covers I ordered from Surefit. They don't photograph as nice as they look in person.
I ordered them in the "Natural" color. I plan to spice them up a little this winter. (I have so many DIY plans…let’s see how fast I get these done!) I wanted a little more texture, and Adam has always hated the look of hodge podge chairs anyways so these seemed like an inexpensive and quick change. 


Scout finishing up a snack in the dining room...
And the best and newest part of the dining room... The rug! It is the Santa Ana Symphony Ikat rug from RugsUSA. I ordered it when they were having a 65% off sale Columbus day, it came the following week. I love it. It was originally $600 and I got it for under 200 bucks. I think that’s a great deal. It’s plush under my toes and I especially love the gold and maroon hues. All the colors are pretty true to the photos on their website. I'm super pleased with this purchase. 
I vacuumed it before we set it up, and it hasn't shed at all. Scout also approves. He likes to nap on the corner while we are in the kitchen cooking/chatting.

Adam on the other hand questioned why we need a rug under the dining table at all. I explained it is to anchor the room. Apparently that meant nothing to him by his expression...men.


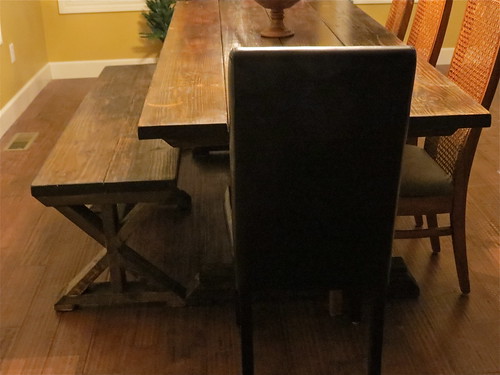
DIY Farmhouse bench on the new rug

DIY Farmhouse table & bench with Ikat Rug.
I'm still on the hunt for the perfect sheers/drapes and also a way to hang them. The window is 10 feet wide darn it! 

See more about our DIY farmhouse table and bench.
See more of my kitchen here.
Paint color is Sherwin Williams Restrained Gold. (although not all the photos do the color justice)


*p.s. This is not a sponsored post by any means, I paid for everything in the room..I'm just labeling and linking back to items that I can for readers!*

Thursday, May 9, 2013

Dream Kitchen! With Electrolux Suite Design


One of the most exciting and important parts of planning and building our home was designing the kitchen. The kitchen is the center of the home when we have friends over, each evening after work, and surely on weekends. We are cooking in it, cleaning in it, or just hanging out in our kitchen. We spend a lot of time there. It was important for us to have a pretty, yet functional kitchen. Appliances play a huge role in this!


One of the newest and I think smartest trends these days is the built-in look. It gives your home a custom look and is easy to do. Electrolux offers a collection of counter-depth refrigerators designed to achieve that look. This is an option we wanted with our kitchen design. The built-in look of appliances makes our layout more appealing and adds room and easy access.

The key to creating a stylish yet functional kitchen is embracing the art of “Suite Design,” selecting beautiful appliances that complement one another and your kitchen – for example the Electrolux matching suites of appliances. They are sleek & stylish yet functional. And oh, so pretty.

Take a look at this gorgeous kitchen below from Electrolux suite design that I pinned from the Electrolux Pinterest board.
What a beautiful kitchen and who wouldn’t want a built in fridge specifically for the vino? Why didn’t we think of that? Darn.
We are currently shopping for one appliance in particular for our home….a new dishwasher. Electrolux seems to be an easy choice. Electrolux Dishwashers feature adjustable, customizable racks that can fit more than 180 items in a single load. With a sleek style and great features—Electrolux suite design dishwasher should be the clear winner! 180 items in a single load? That is almost my entire set of Fiesta dishes! Woohoo!

If you are in the market for new kitchen appliances, please check out the gorgeous Electrolux Suite Designs. I know you will find something you love. Hop over to their Pinterest board or like Electrolux on Facebook too for some more appliance pretties.
Believe me-- there will be plenty of appliance inspiration and ideas for you if you are ready to remodel, redo, or even build a brand new kitchen just like we did!


Are you planning a kitchen remodel or design? What is on your list?


I was selected for this opportunity as a member of Clever Girls Collective, and the content and opinions expressed here are all my own.

Monday, January 14, 2013

Our kitchen

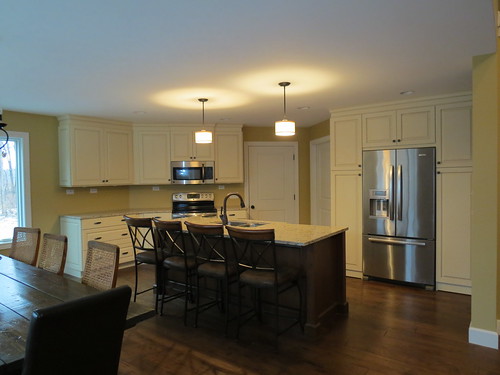
And finally, although there are a few small details the cabinet installer dude has to finish up, I can show you my kitchen.


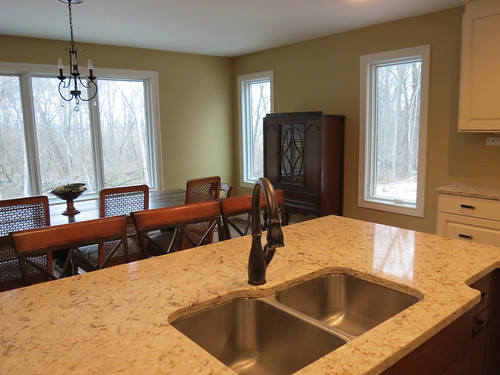
We wanted an open feel so we made the dining area and the kitchen all flow to the great room.  I love the layout. It was one of the best changes we made to the house plans. It is perfect.

Counter Stools from Wayfair
The counter stools were a Christmas gift from my parents. Thanks Mom & Dad! We love them.

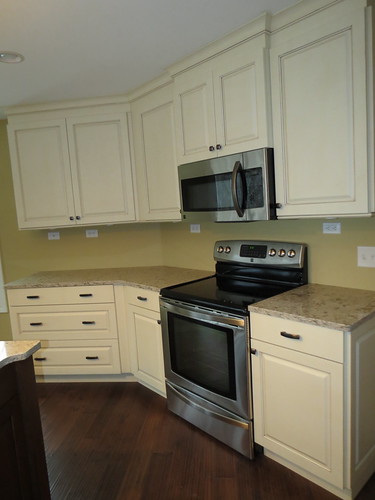
Range and microwave-hood are both Kenmore
I think my favorite part of this part of the cabinets is the pop out over the microwave.

Adam was worried we wouldn't have enough cabinet space. It does look we have a small amount of cabinets and...I have a lot of dishes....

Fiesta Fiesta!! (some of them are in the dishwasher too...)
But they fit--- with room for more!
We have almost all of our dishes, pots & pans, and small appliances unpacked and tucked away in the cabinets and we still have a few open spots. I was surprised too. Even the pantry has one whole shelf with nothing in it...and we are stocked up on groceries.


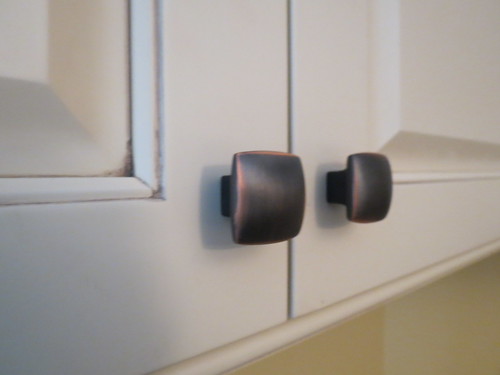
And check out the details! A close up of the glaze,  and our fabulous hardware.
Venetian Bronze Square Knob 1" By D. Lawless Hardware
Venetian Bronze Pull 3" by D. Lawless Hardware
I love the knobs and pulls. They are heavy duty without being too bulky and the color and style works perfect with the look of the room.

They were provided by D. Lawless Hardware. Please check them out if you are in the market for new cabinet hardware. Can't beat their prices and selection!
And if you are a local reader-- BONUS their store is located in Olney, Illinois!!*
*more on that later!

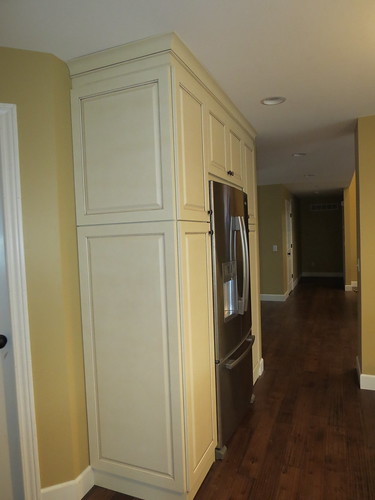
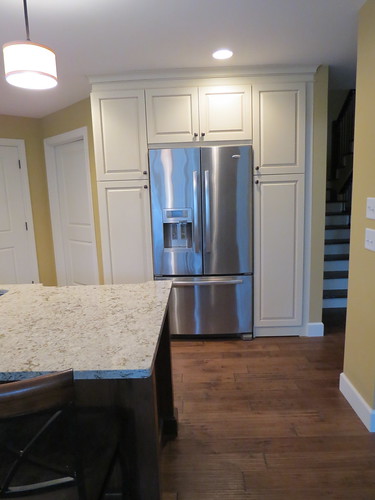
Fridge is Whirlpool Gold. Behind the fridge is our utility room.
We chose to have the fridge flush with the pantry cabinets for a cleaner look. It was interesting watching the boys shimmy this thing in. I was doing the nervous-nellie dance for my floors...but they did a good job.


so pretty.

Electrician will be back to finish up this plug too.
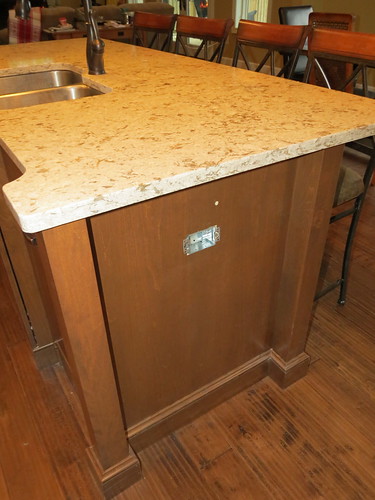
Here is a better photo of the color & detail of the island. We wanted the mixed color look of the dark and white and then we opted to go with the glaze on both colors to bring it together. 

I love the decorative feet on the island.

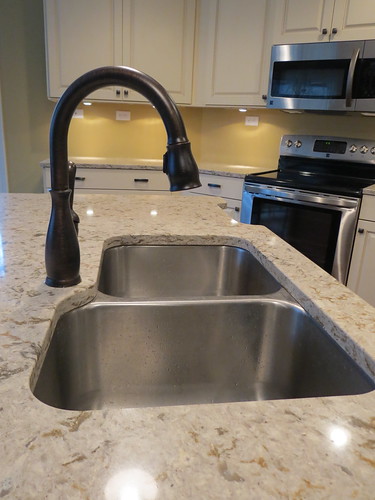
Quartz countertop is by Cambria. I chat more about our choices of countertop and cabinets in this post. 
faucet by Delta. 
Quartz countertops. With sparkles. They are so hard to photograph. But there really are SPARKLES!!


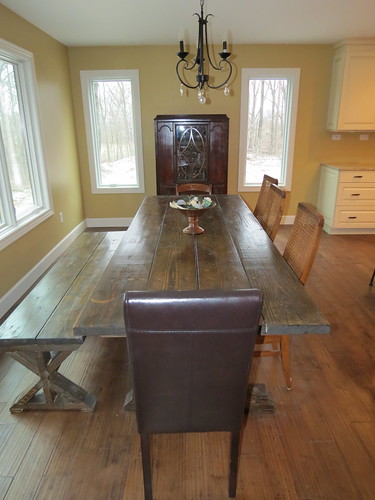
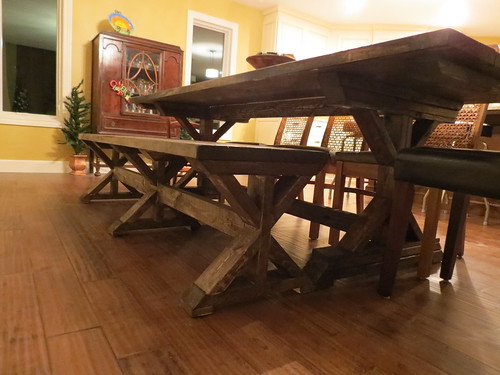
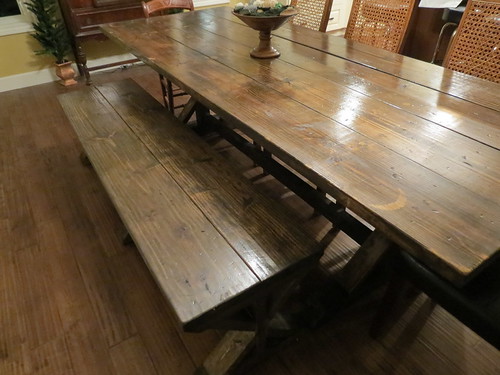
Our DIY farmhouse table and bench.  
And in case you missed it. Another shot of our DIY rustic farmhouse table and matching bench.


One more photo for the road.
Island lighting from the Home Depot.

What do you think of my kitchen? 
Do you like the mix of white & dark wood?
Are you a fiestaware collector? 


I was not compensated at all for this post but I will tell you the cabinet knobs and pulls were provided by the wonderful D Lawless Hardware.

Tuesday, January 8, 2013

DIY Rustic Farmhouse Bench

And now we have a place to sit...


One afternoon I came home from work and there was a bench ready to sand & stain...

It took him just a couple of hours to build. He used plans from Ana White's site just like we did last month when we shared our DIY Farmhouse Table.

It's perfect.
Actually everyone who comes over now says "it's so big!" Well, who wants to have half your butt hanging off the bench while you are having dinner? (we do not have tiny buns in this house...) Not me, so we made it larger than the plans called for. And longer, because our dining area is a pretty large area.


Right now we have kind of a hodgepodge of chairs going on. I sort of like it, but have a few changes in mind, and am on the lookout on craigslist & auctions.

I wanted chairs on one side and also on each end. Do you think we need a bench for the other side too? I vote chairs. Adam votes bench. Scout also votes bench.

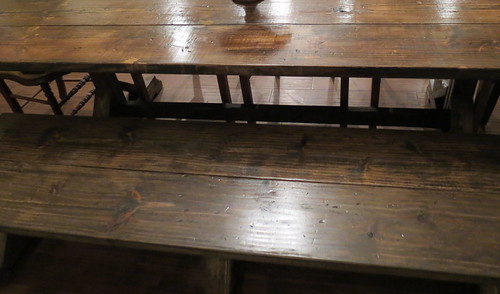
Close up shows the slight color difference.

It took us about an hour to sand & stain it. Then of course a few coats of poly.
To stain it, we used a mix of Classic Grey & Jacobean by Minwax. Although, this time I added a little more classic grey...so the color varies from the table by just a tad. Oh well.


What have you built from Ana White's plans? 
Do you think we need a bench for the other side or stick with chairs? 
Do you mix your stains to get the look you want? If so do you always measure correctly? I just kind of throw stuff together. oops.
Related Posts Plugin for WordPress, Blogger...
Follow on Bloglovin
Web Analytics