
Today I’m
sharing a simple DIY play tent that can be made during nap time. Really…. We
did this during nap time. It was the easiest project we’ve ever done.
 |
| Photo Credit Danaille Huffman Photography |
Those tepees are so popular right now and obviously
it’s because they are gosh darn cute, aren’t they? I see them all over
Instagram and blogs. They seem to be a staple in every nursery. Check out this adorable gold and white striped tepee Hudson & Co. used in their gender neutral nursery! I so wanted one
for Benjamin. He’s now at the perfect age to get a kick out of something like
this. But I couldn't convince myself to spend the cash on one, even if they did make my heart pitter-patter.
So, as we typically do, we looked into DIY-ing our own. After doing a few minutes of brainstorming, instead of the tepee, we found inspiration from this cool explorer style tent from Land of Nod.
So, as we typically do, we looked into DIY-ing our own. After doing a few minutes of brainstorming, instead of the tepee, we found inspiration from this cool explorer style tent from Land of Nod.
 |
| Land of Nod $199 |
So stinkin' cute huh? Look at the price tag too. Yipes. Well, this would have been perfect for Ben, but we didn't build that either. I think a tepee would've been easier than that! However, we took that as inspiration--which reminded me of the Boy Scouts, which made me think vintage Boy Scout stuff you see at flea markets...and sometime after that...we ended up with a super simple version--a traditional A-Frame style tent. I did a bit of google-ing and found we were not the only ones building our own tents for our kiddos.
As I said earlier, this was a quick project. Even better? It was inexpensive. Total cost for supplies was about $25.
1 Drop Cloth $9
3 3/4 Dowels $9
4 1X2x48 boards $8
Stain: Minwax American Walnut was already on hand from past projects
Stitch-witch: leftover from other projects
Total: $26

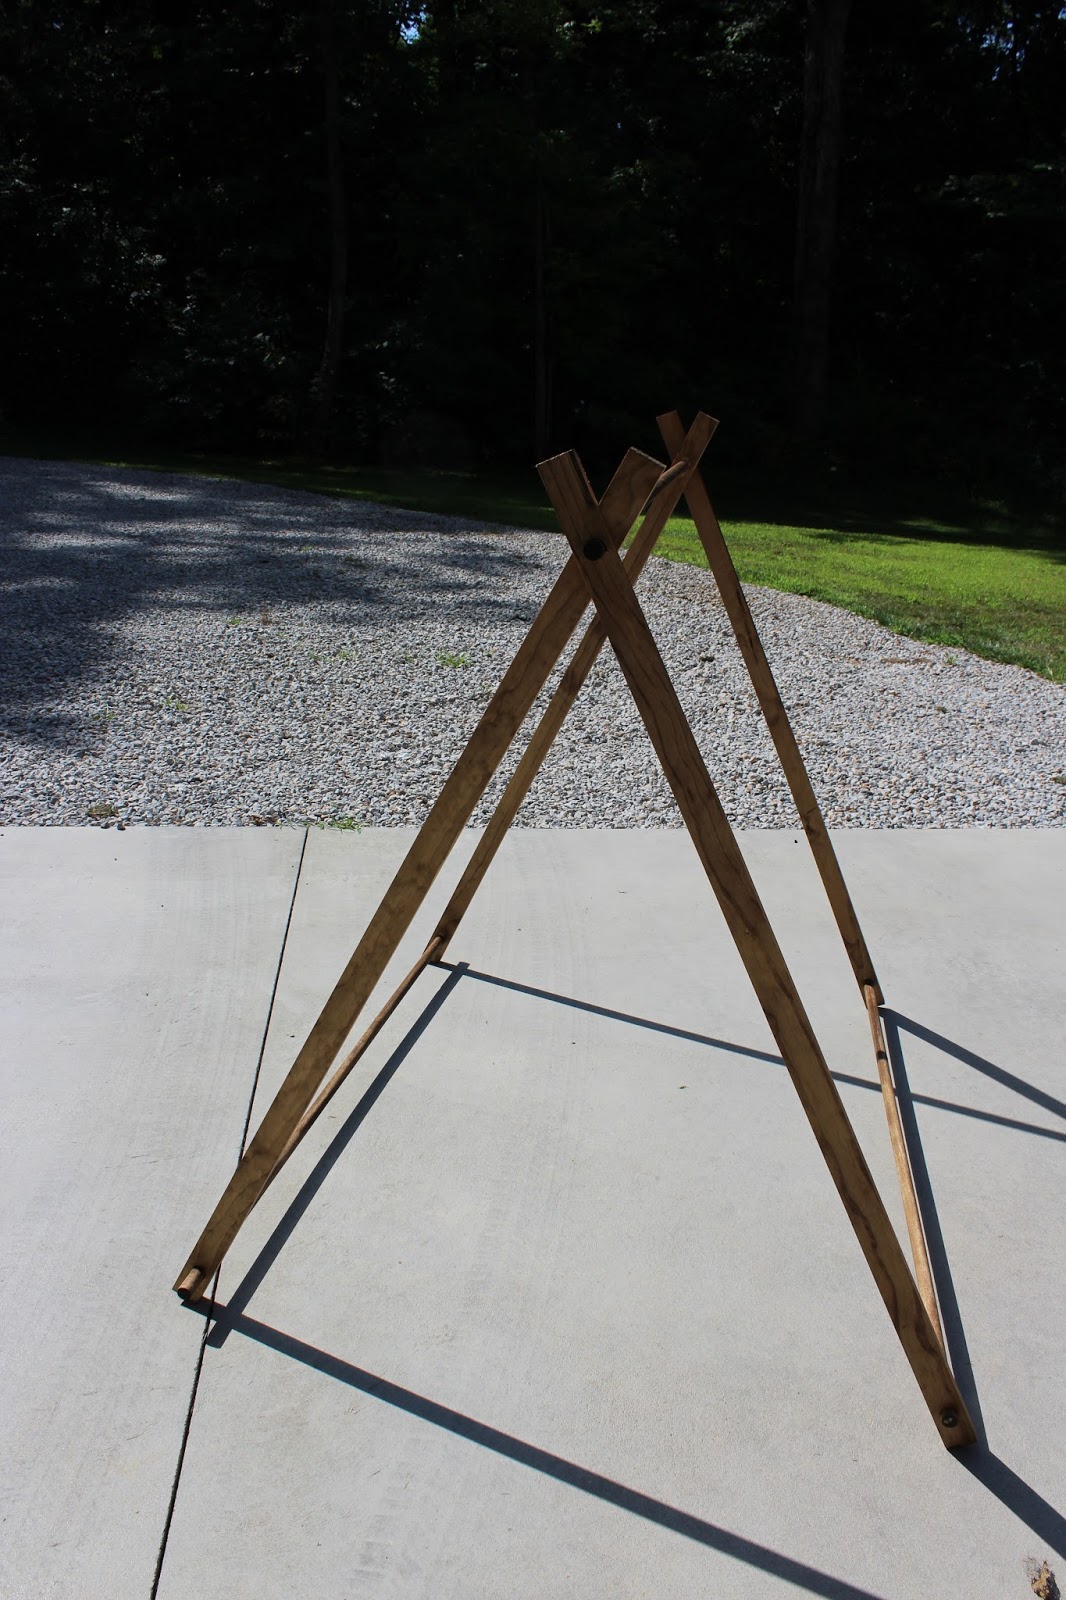
This project took less than an hour total. But, having a toddler it still took us two days. Adam stained the frame while Ben and I watered the flowers one evening. The next day, it took Adam about 10 minutes to measure, cut, and drill the holes.
Just like that--and the frame was finished.

1 Drop Cloth $9
3 3/4 Dowels $9
4 1X2x48 boards $8
Stain: Minwax American Walnut was already on hand from past projects
Stitch-witch: leftover from other projects
Total: $26

This project took less than an hour total. But, having a toddler it still took us two days. Adam stained the frame while Ben and I watered the flowers one evening. The next day, it took Adam about 10 minutes to measure, cut, and drill the holes.
Just like that--and the frame was finished.
During naptime, I cut the drop cloth a bit bigger than the frame, and stitch-witched loops for the dowels. It took me about a half an hour to cut and stitch-witch. It was such a fast project I'm pretty sure we both got to nap during nap time too. Seriously! I think the hardest part was putting it together with Ben and Scout chasing each other around and causing a commotion that evening.
Finito!

As far as the how-to...like I mentioned above we are not the only ones who have built our own kiddo tent. A quick pinterest search will give you a few dozen tutorials. We followed the HandMade Mood's tutorial.
The only difference was we used 1x2s instead of slats. She also used a lighter fabric than a drop cloth.
I imagine an old king sized sheet would be perfect too. Or if you had a coupon at Hobby Lobby or Joanne's you could use a few yards of printed fabric for some pizzazz. I like the simplicity and texture of the drop cloth. Maybe we'll stencil something on it later.

For now, this is stationed in our basement for playtime. Later on when Ben gets a big boy room, we’ll move it there so he can have his own reading nook.
Bonus: the tent folds up in a snap for easy storage when we need the space in the basement family room.


Ben likes to bring his toys into the tent to play.


He liked it so much, we took it with us to his 18 month photo shoot. I added a few camping themed items I had from the house. It ended up being a fun prop, and the photos turned out perfect.
Here is another shot of the basement. It's pretty easy to keep clean with all the bins for Ben's toys on the barn wood built-ins. I did make sure Adam's stinky socks were out of the frame when I took the photos. However, the plastic slide & basketball hoop are never not in the living room. Sidenote: I'm still figuring out this whole DSLR thing. The carpet is grey, taupe & brown...not purple!

More to come!
Finito!

As far as the how-to...like I mentioned above we are not the only ones who have built our own kiddo tent. A quick pinterest search will give you a few dozen tutorials. We followed the HandMade Mood's tutorial.
The only difference was we used 1x2s instead of slats. She also used a lighter fabric than a drop cloth.
I imagine an old king sized sheet would be perfect too. Or if you had a coupon at Hobby Lobby or Joanne's you could use a few yards of printed fabric for some pizzazz. I like the simplicity and texture of the drop cloth. Maybe we'll stencil something on it later.

For now, this is stationed in our basement for playtime. Later on when Ben gets a big boy room, we’ll move it there so he can have his own reading nook.
Bonus: the tent folds up in a snap for easy storage when we need the space in the basement family room.

The twinkle lights were a super clearance find at Homegoods one year. I should have bought all they had.

Ben likes to bring his toys into the tent to play.


 |
| Photo Credit Danaille Huffman Photography |
 |
| Photo Credit Danaille Huffman Photography |

More to come!


No comments:
Post a Comment
We love to hear from our readers! Please comment and tell us what you think!