Showing posts with label paint. Show all posts

Wednesday, September 23, 2015

Basement Update: Alternative Ceiling

Way back in January and February--before Benjamin made his arrival, we were working as fast as we could to get the basement prepped for drywall and mudding. We're cash flowing this project--and knew when Benjamin arrived we'd have other things to spend money on. Diapers, medical bills...more diapers.

Well, lucky for the basement---and miserable for me--I was going on a week overdue. The mudding and sanding were all complete before Benjamin made his 5-day-late appearance. We picked out paint colors one afternoon and the painter came the next day. We decided it would be easier, and quicker to hire this out. Plus, I'd be no help being 41 weeks pregnant and all. I'll share colors another day.

The best part about this basement update is the ceiling. Oh the ceiling has been such a treat. We've been hemming and hawing over the ceiling since we started.

We don't want to spend big bucks. But we want the basement to be as non-basement-y feeling as possible.

Our approximate finished living space will be just over 1,200 square feet. We will have a large family room and entertaining space complete with a wet bar. The basement will have a large bedroom/office with an en suite bathroom.

Ceiling Options:
  • 100% Drywall Ceiling: This looks the nicest. Makes the basement feel less 'basement-y'. Unfortunately, it costs the most, and if we ever need to get to pipes or wires in the ceiling it would be a mess. Estimated Cost: $2,400
  • 100% Ceiling Tile: Most people use ceiling tiles in their basement. They are inexpensive and can be customized. They're simple to install even for a newbie DIYer. Of course, the style we liked the most, cost the most. This is how my life usually works. Estimated Cost: $4,400
  • 50/50: Half ceiling tile, half drywall.  This seemed to be the best choice for looks, and keeping access to pipes and wires, Estimated Cost: $4,000
I will admit, I watched a little too much Fixer Upper marathons on HGTV during maternity leave. I love that show and I super love Jo & Chip. Just like Jo, I now love shiplap too.   Well, a combination of spending too much time on Pinterest, watching HGTV....and also seeing my in-laws finish their basement ceiling while I was on maternity leave. I had an idea...

Shiplap ceiling.
A fresh shiplap ceiling.
Source
We can't exactly secure the boards right up against the ceiling, because again...pipes and stuff. But we plan to a modified version of a shiplap ceiling. With a few beams of some sort supporting the wood. Barn wood, or maybe faux wood beams?

The plan is to stain the shiplap Jacobean by Minwax. Which is the stain throughout our woodwork a good chunk of the cabinets on the future wet bar.
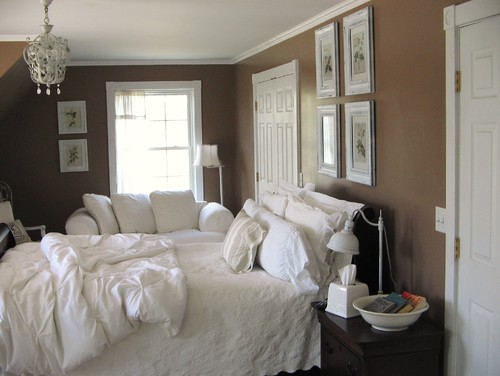
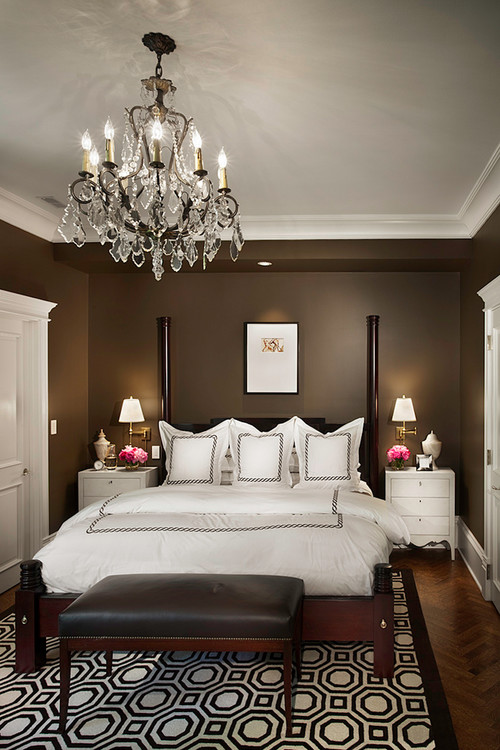
The bedroom on the other hand needs to be a little more bright and airy. So I'm considering switching the Jacobean stain for white paint.

Similar to this room.
Source
  • 2/3 Shiplap 1/3 drywall: We have a small portion over the family room already drywalled and painted. So doing a rough estimate based on what we paid for the drywall materials and labor plus estimate for the shiplap. Estimated cost: $1,600

We're getting help from our contractor on installation and setup. But we plan to do as much as we can ourselves, especially the prep work and staining and painting.  We can't wait to incorporate this look into our home.

Would you do an alternative ceiling option like shiplap in your home?
If you already have please share!

More in the basement finish series:
Drywall and barn beams!
Why our basement is not going to be a 'man cave'.

Wednesday, April 15, 2015

Nursery Dresser Makeover: From Wild Tween to Vintage Preppy!

When we shared Ben's Vintage Nursery we said the "before" on this dresser was pretty wild...here she is:

Wild is right, yes? That would be neon green, bright purple, and pink, orange mixed in there too!

This was in my sister's room when she was a tween. Her bedroom was painted all crazy. Like, I'm talking Nickelodeon themed colors, and stripes, and neon, with zig zags on the wall. I wish I had a photo to show you. But you will just have to imagine the colors from this dresser--but up the crazy x1000.
Prior to becoming purple beast, this piece had been in the family for awhile. It actually belonged to my great grandparents. I'm not sure what the original dresser color was, but I'm going to guess it wasn't this bright. It's nothing fancy, but it was nice to have a piece from my family for his room.

The plan was to stain the top of the dresser a deep walnut brown, and paint the rest in a bright chalk paint blue. Adam had to strip the top of the dresser for me (paint thinner not pregnant lady friendly!) And scrape all the layers of paint off.  And I'm talking layers. This dresser had been painted several times before the Nickelodeon tween room.


When we got the paint off, we realized the top was not ~real wood~. Adam took the sander to it and lightly sanded the top to make it smooth.

We were ready to begin!

Since the top was not real wood, we used Minwax Gel Stain in Dark Walnut. The gel stain works on fabricated wood.

This was after the first layer of stain...not so bad but needed another coat.

I used Webster's Chalk Powder paint, mixed with Sherwin Williams Blue Plate. The chalk paint powder is all natural, so it was safe for me to use it while I was pregnant.  The nice thing about chalk paint is that the piece doesn't need to be primed or anything, just wiped down and painted! 

I mixed it with Sherwin Williams Blue Plate and used their Harmony brand of paint which has 0 VOC. 

I probably would have been fine with regular SW paint, and a mask, and outside..but I was a spaz about that sort of thing. I also avoided ham sandwiches and JIMMY JOHNS for the whole first trimester. Now that was hard to do!


Anyway, it took me one weekend to paint it. Mostly because I was tired from being pregnant. I had to take 600 breaks. It could have been finished in one day by a non-pregnant person. The paint dries SUPER fast, and there was hardly any sanding involved.  

I finished it with a dark wax by Fiddles N Sons brand... Which Webster's recommends for use with their products.

Here it is all done up in Ben's room.

The pulls were from Menards hardware section. I'm more of an Oil Rubbed Bronze hardware girl, but the brushed dark silver just looked so much nicer.  They also go nice with the DIY bookcase in his room. We'll share about that very soon, along with some other great details!

See the rest of Ben's vintage nursery!

Wednesday, May 29, 2013

Pillars! We are #countryfolk no more!

Ok, that post title is just a flat out lie. I suppose we are still a tiny bit hillbilly. After all, the bed spring we pull behind the four-wheeler is sitting outside my dining room window as I type this. Yep.

But anyway...

The exterior of the house has had just a couple of sticks holding up the front porch roof since like...last summer when it went up.
Dad begins the stonework...winter 2012

Backfilling...spring 2013
Then one day I came home from work and there pillars! They were so pretty. It made the house less shanty-like....

 But, they were WHITE. Bright white. Too white.

So last week we painted them.


 And I do mean both of us painted them. I just took breaks to take photos...someone has to document for the blog ya know!

I had plenty of work to do. Like painting almost all of the tiny indentations first which was a pain in the rear end--while Adam just walked over and did a roller here and there. Luckily, I am quite a bit shorter than Adam and he had to get on the ladder and do the tops.


After about 4 hours of work with one catnap in between coats...
White pillars no more!


We still have one more coat of brown to roll on-- which should be easy if it would stop raining!


 We decided to dress it up with some red, white and blue...


A complete look as it is right now....


It looks so much more finished, and a little less #countryfolk. My dad will be putting a few more stones on the bottom of the front porch this summer and then the exterior will be even closer to completion!


Did you dress up your house for Memorial Day? 
Did you get any projects done or did you get to enjoy fun only?

Wednesday, September 26, 2012

fireplace part 1 and 2

Everyone has been asking what about the blog? Where are the photos of the updates? Truth is, they have all been sitting on my camera...we have either been too busy or too tired to blog. Or to do laundry for that matter. 

The past two weekends my dad has traveled the three hours south to help us work on the house. My dad is stoning the fireplace and the exterior of the house for us, with Adam's help of course.

Here are some photos of what he has been working on...

My dad climbing down the scaffolding.

The scratch coat gives the stone something to stick to.

Ready for stone.

This is how we cheat the look of a full masonry fireplace.
Instead, we purchased a fireplace insert, and had it framed so we could stone around it.

Adam will probably not appreciate this photo, but this is the view from the kitchen/dining.
Oh and I was also re-picking out paint colors the evening before they needed to be picked up. Yup.
 ...more on that story later.

And the underlaminate is in, ready for hardwood.
Well, after the fireplace is stoned anyway.
At least the dust is gone.

And after the second weekend:


He picked out the stone for the hearth and cut it to size for us too.
Oh and the house is painted now too! But don't judge it by these photos because it looks different in these.
I haven't figured out how to make my fancy camera take photos of painted walls. Be patient with me.

We love it.
We can't wait for him to be able to come back down and work on it more.
Love you dad, thank you for all your hard work!


This weekend, we are starting the hardwood upstairs...
What do you think of the fireplace? 
Do you like the stone?
Does your dad ever wear a shirt?
Can you explain to me how to take photos of painted walls with my fancy camera? 

Monday, August 27, 2012

Rock.

The rock has arrived!

The stone will be on the exterior front of the home, as well as the fireplace.

Machine cut, webwall stone.


And also, I finally picked out a color for the living room and kitchen area the day the stone arrived. The perfect beige, with yellow base, not green!


 The color I had thought I liked, looked terrible with the stone. And since the fireplace will be so large, it's obviously important. So I sat at the house for an hour, bringing sample stones inside and holding up colors. And the winner is...

Sherwin Williams Camelback.
And Adam has been busy, he started the black tar paper on the front of the home. He still needs to finish above the front porch, but I'm guessing he's waiting for my dad to help him with that...


So what do you think? I am so excited for Adam and my dad to start the stonework.

Monday, August 20, 2012

Master Bedroom dreaming.

I am dreaming of my master bedroom.
We will finally have a big enough bedroom for a king sized bed.
Plus, two night stands!
And we will have ample closet space, so I don't have to live out of laundry baskets and Adam's clothes can be on the floor of his closet instead of the floor of the bedroom!
And also, our walls don't have to be white.

We went with a rich brown color for the master bedroom walls. (forgive me, but I can't remember for the life of me the name of the darn color swatch---I'll figure it out when we show it to you on the walls)

Some of my inspiration...
Via Houzz

Via Houzz
Via BHG
The color we chose is sort of in between the first two colors. We wanted our room to be cozy, warm, and relaxing.

For the master bathroom, we went with just a lighter shade of the bedroom color.

What do you think? What accent colors do you suggest? I love the look of whites and creams but I need a little color to spruce it up too. My mother suggested turquoise.

Monday, August 13, 2012

Paint Picking out

Here is my problem. I have never picked out paint for walls. Ever.  Okok, wait---when my parents redid my bedroom when I was 13 I picked out key lime for my walls. Key lime.

We have been living in rental houses for the past few years. And what is the point of painting a rental right? So we have been living with white walls. I am soso ready for some color in my life!

What am I leaning towards for wall colors? Not key lime. But beiges. beige beige beige. I might explore a little later on down the road, but my plan is to mix things up with color in my accessories. This way, it's also easier for me to switch up my style. Baby steps.

So here are some of the options for the great room, hallway area...and possibly the kitchen too.

Macadamia by Sherwin Williams

Kilim Biege again by SW


What do you think? I also have about 16 other beiges that I am considering. Those were just the favorites of the day. It changes daily. There are way too many options.

And with such an open floor plan how do you decide where one color stops and another begins? Is it safer to just have all the main living areas one color?

I tried to get one the griege train. But, grey just isn't a color I could live with. I am more of a warm neutrals kind of girl.

p.s. Sherwin Williams did not sponsor this post or anything. We just get a discount since we are Illinois Farm Bureau members. I holla for a dolla honey boo boo child. 

Honey Boo Boo child

Do you have any paint picking out tips for me? 
Am I going too bland....even if I plan to add color with my accessories?
Have any suggestions of your favorite beiges? 

Next up, Master bedroom color scheming. 
Related Posts Plugin for WordPress, Blogger...
Follow on Bloglovin
Web Analytics